
40 Earrings in 40 Hours
I decided I needed more SeaDragon stud earrings.
Many more.
I also decided I would find out how many I could make in just one week! (because reasons)
Day 1 (Monday):
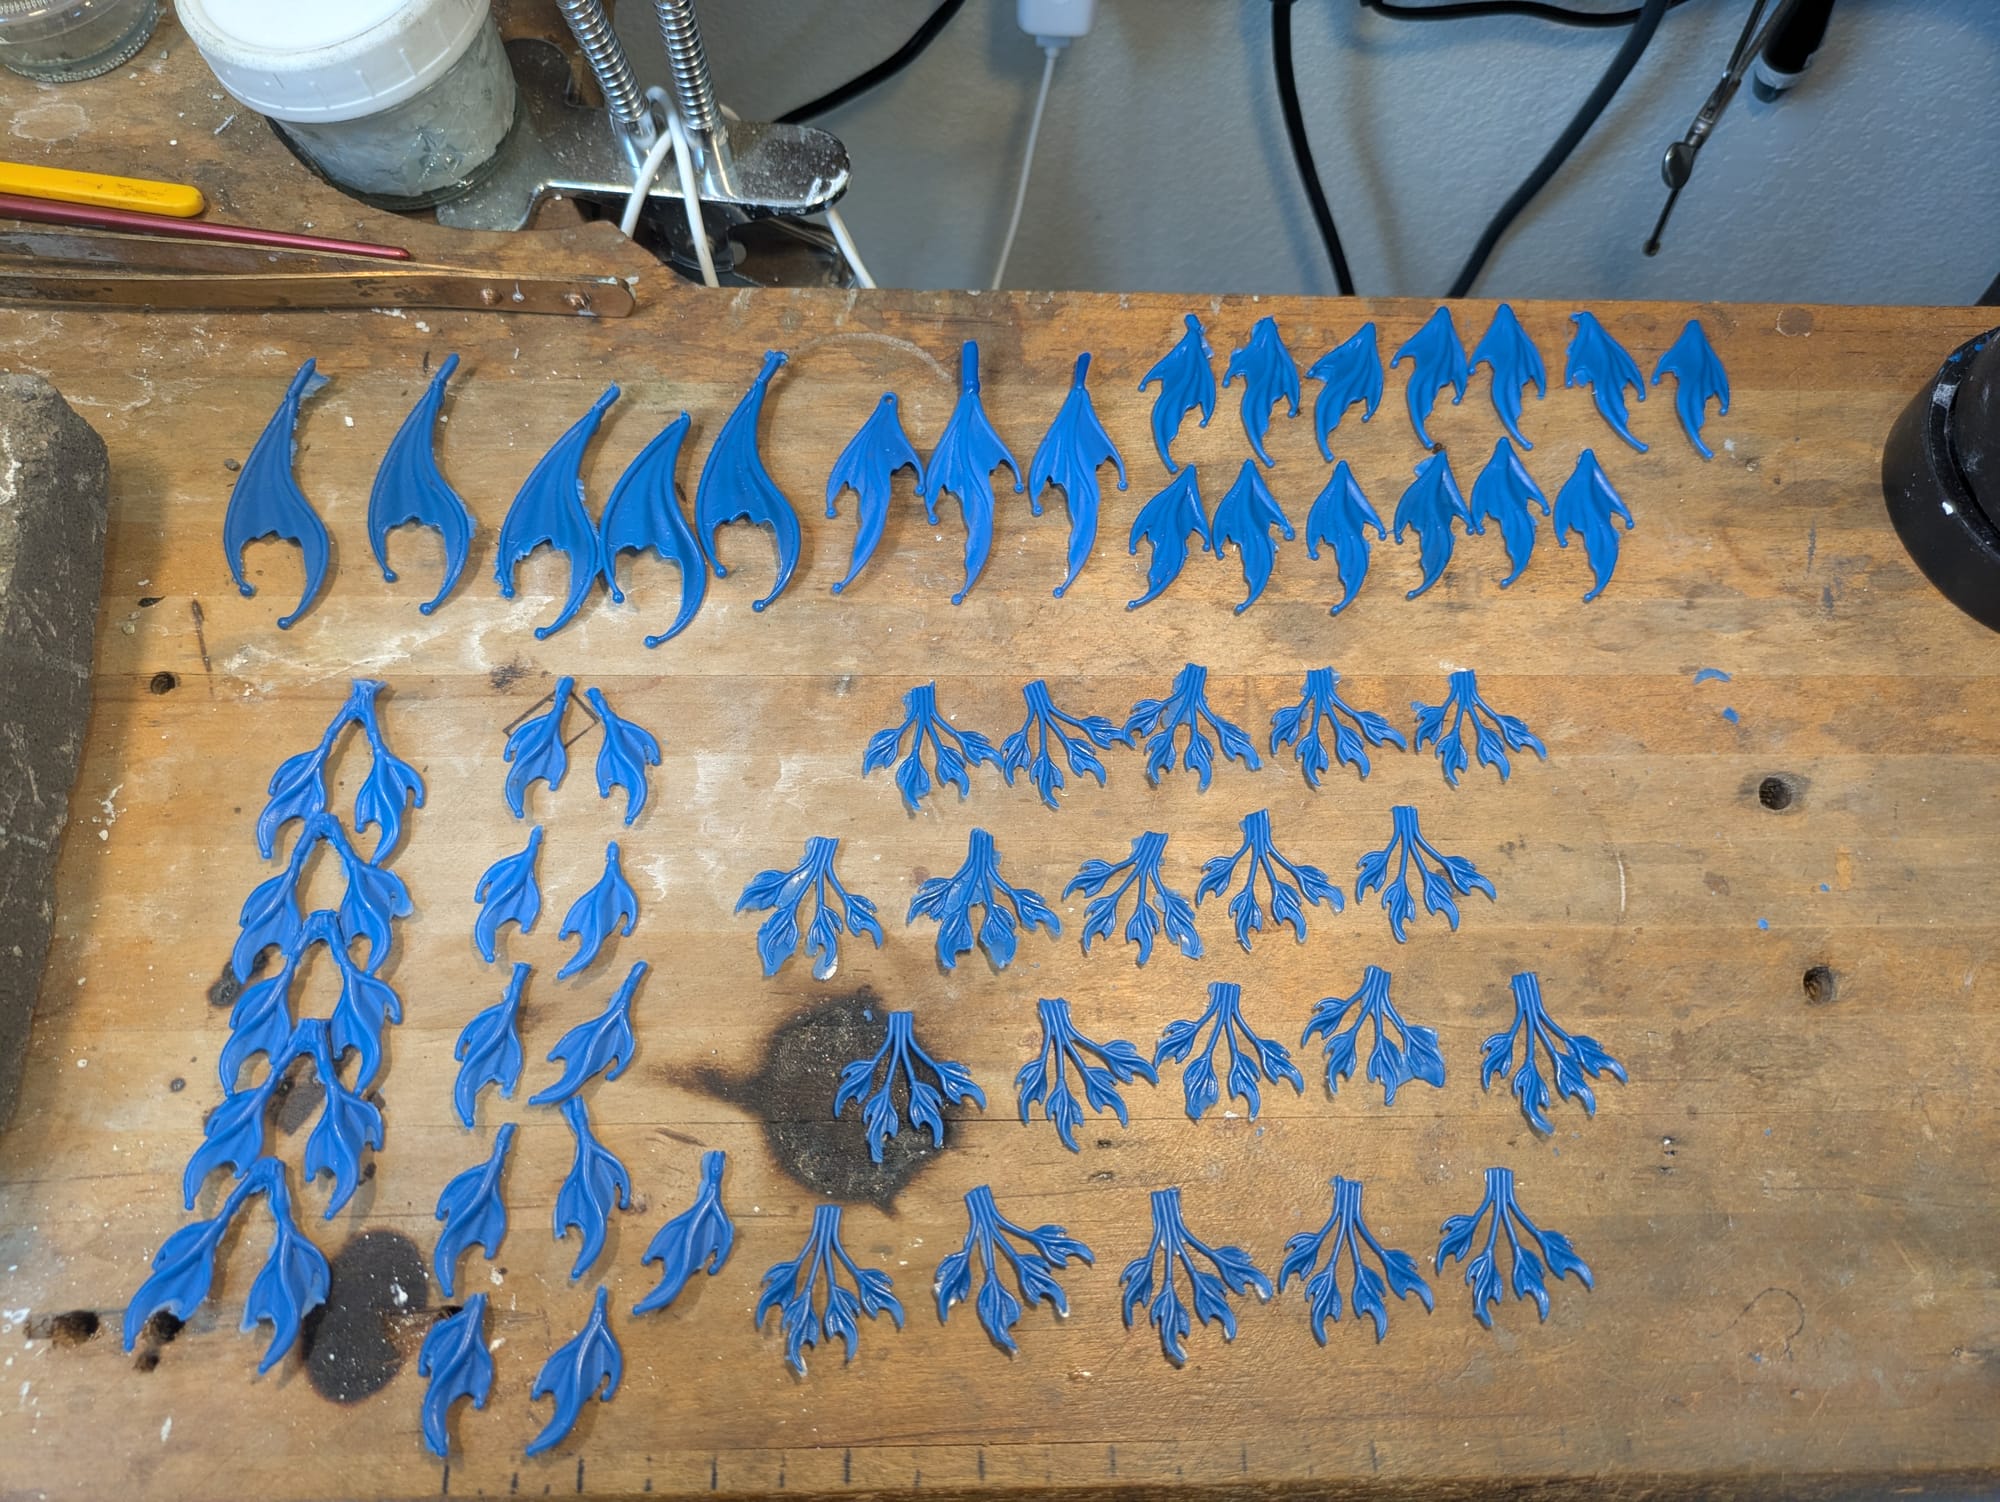
Luckily for this crazy idea, I already have a mold for the Mini SeaDragons. Each mold makes 4 pieces, which is 2 sets of earrings. Filling wax molds is zen, almost mesmerizing. You just go, and keep going... and keep going.. and suddenly you have 40 pairs of earring waxes, plus a big pile of bigger pieces you aren't even sure if you'll use 🤷 Ah well, wax is re-usable.
Day 2 (Tuesday):
Spruing is a little more tedious. This is the process of attaching the wax models to a main stem, like a tree, which later will help funnel molten metal into each mold. Building the tree itself I actually quite enjoy, but before that each and every wax needs to be inspected, sometimes sanded and smoothed, and attached to smaller feeder branches. It can be a little fiddly.
(If you didn't know I live for fiddly)
At first I stopped at around 28 pairs (56 total Mini fins) and started adding on the slightly larger pieces on the second tree. Then I reached for an even larger piece, realized it wouldn't fit! and decided to just do the rest of the Minis. So in all I have 40 pairs of earrings sprued up.
The sprue trees are then placed in their flasks, and the flasks are filled with investment to create the molds! (I mean its more complicated than that, but we can dig into those details another time.)
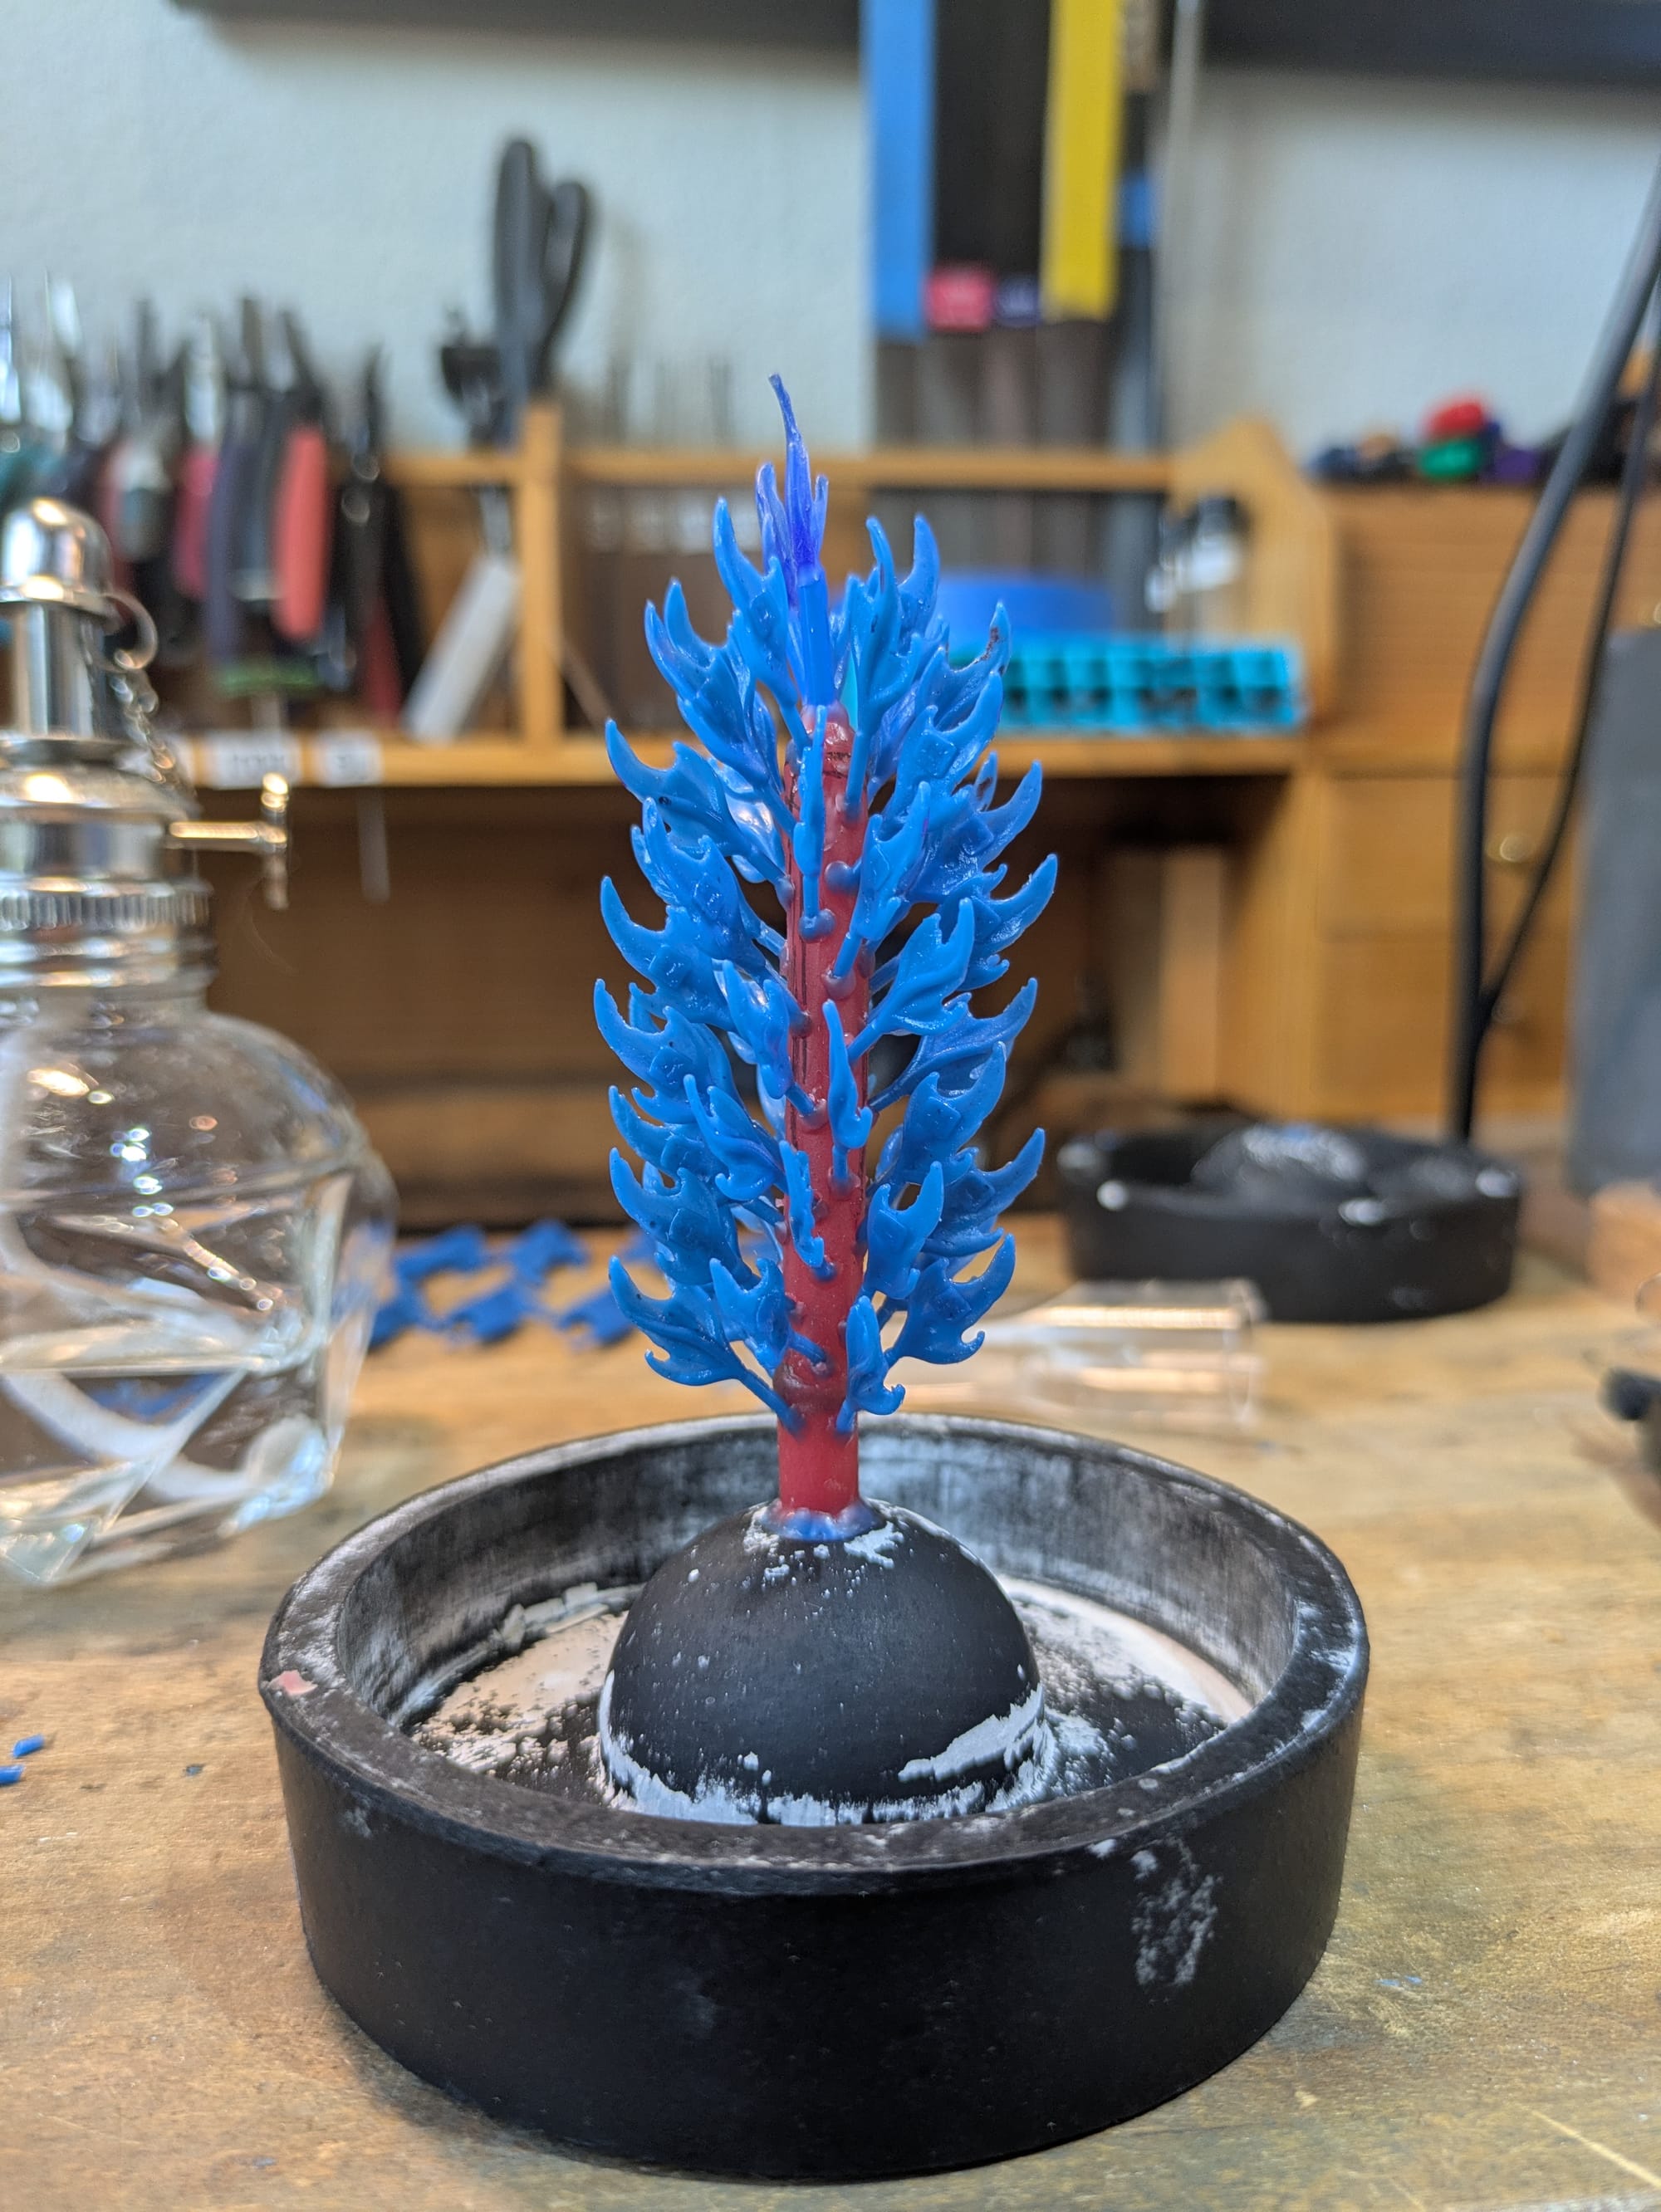
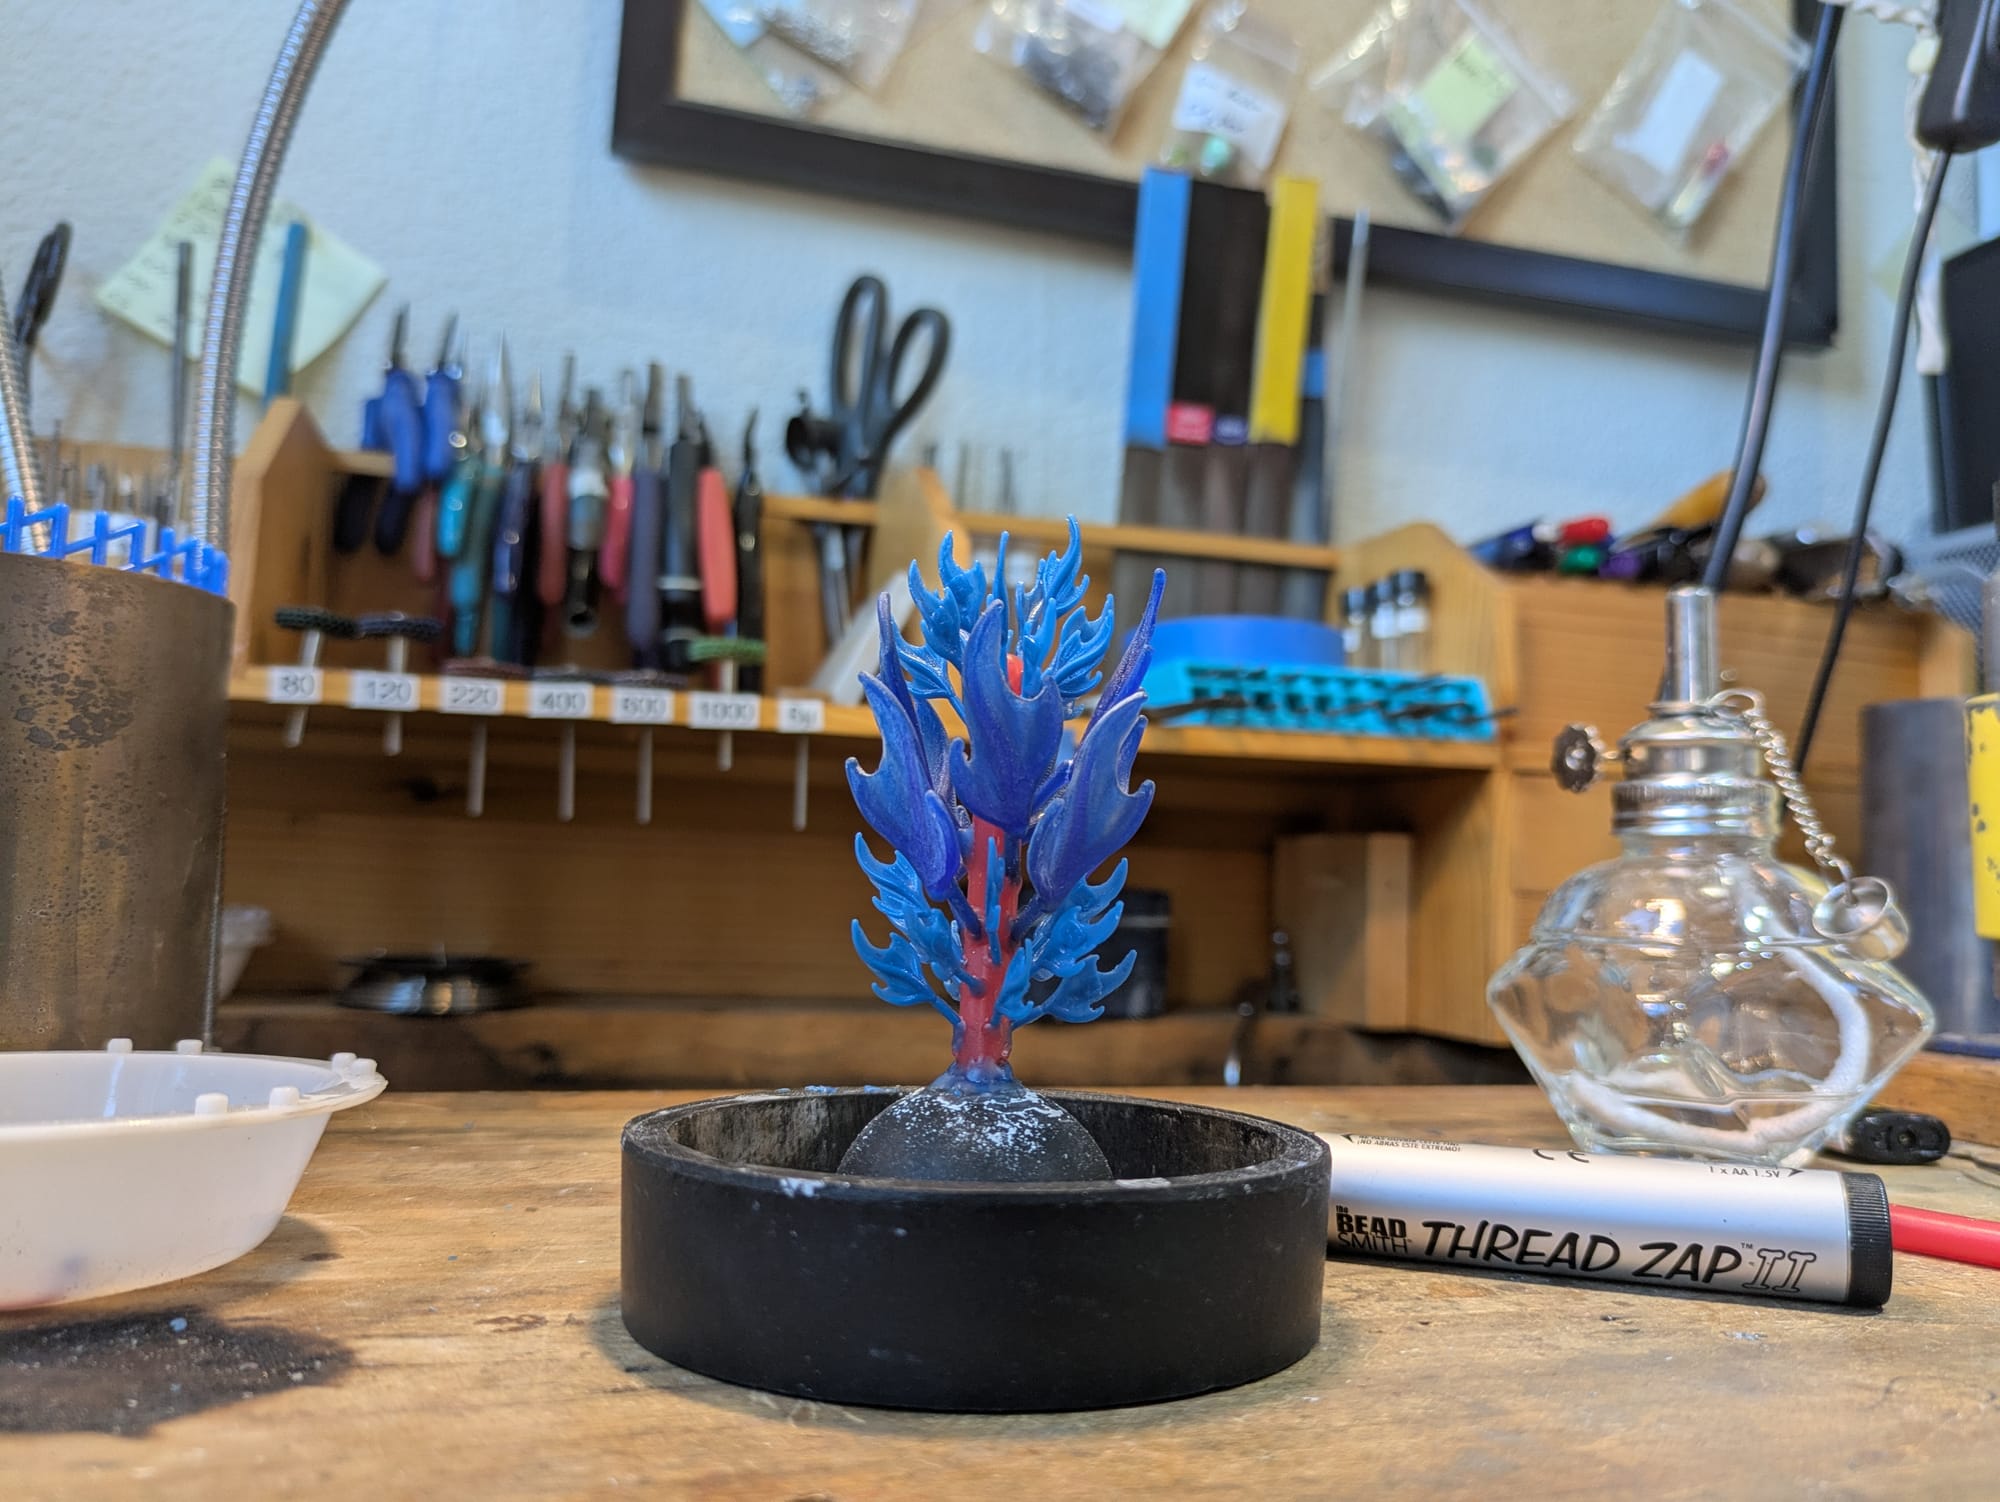
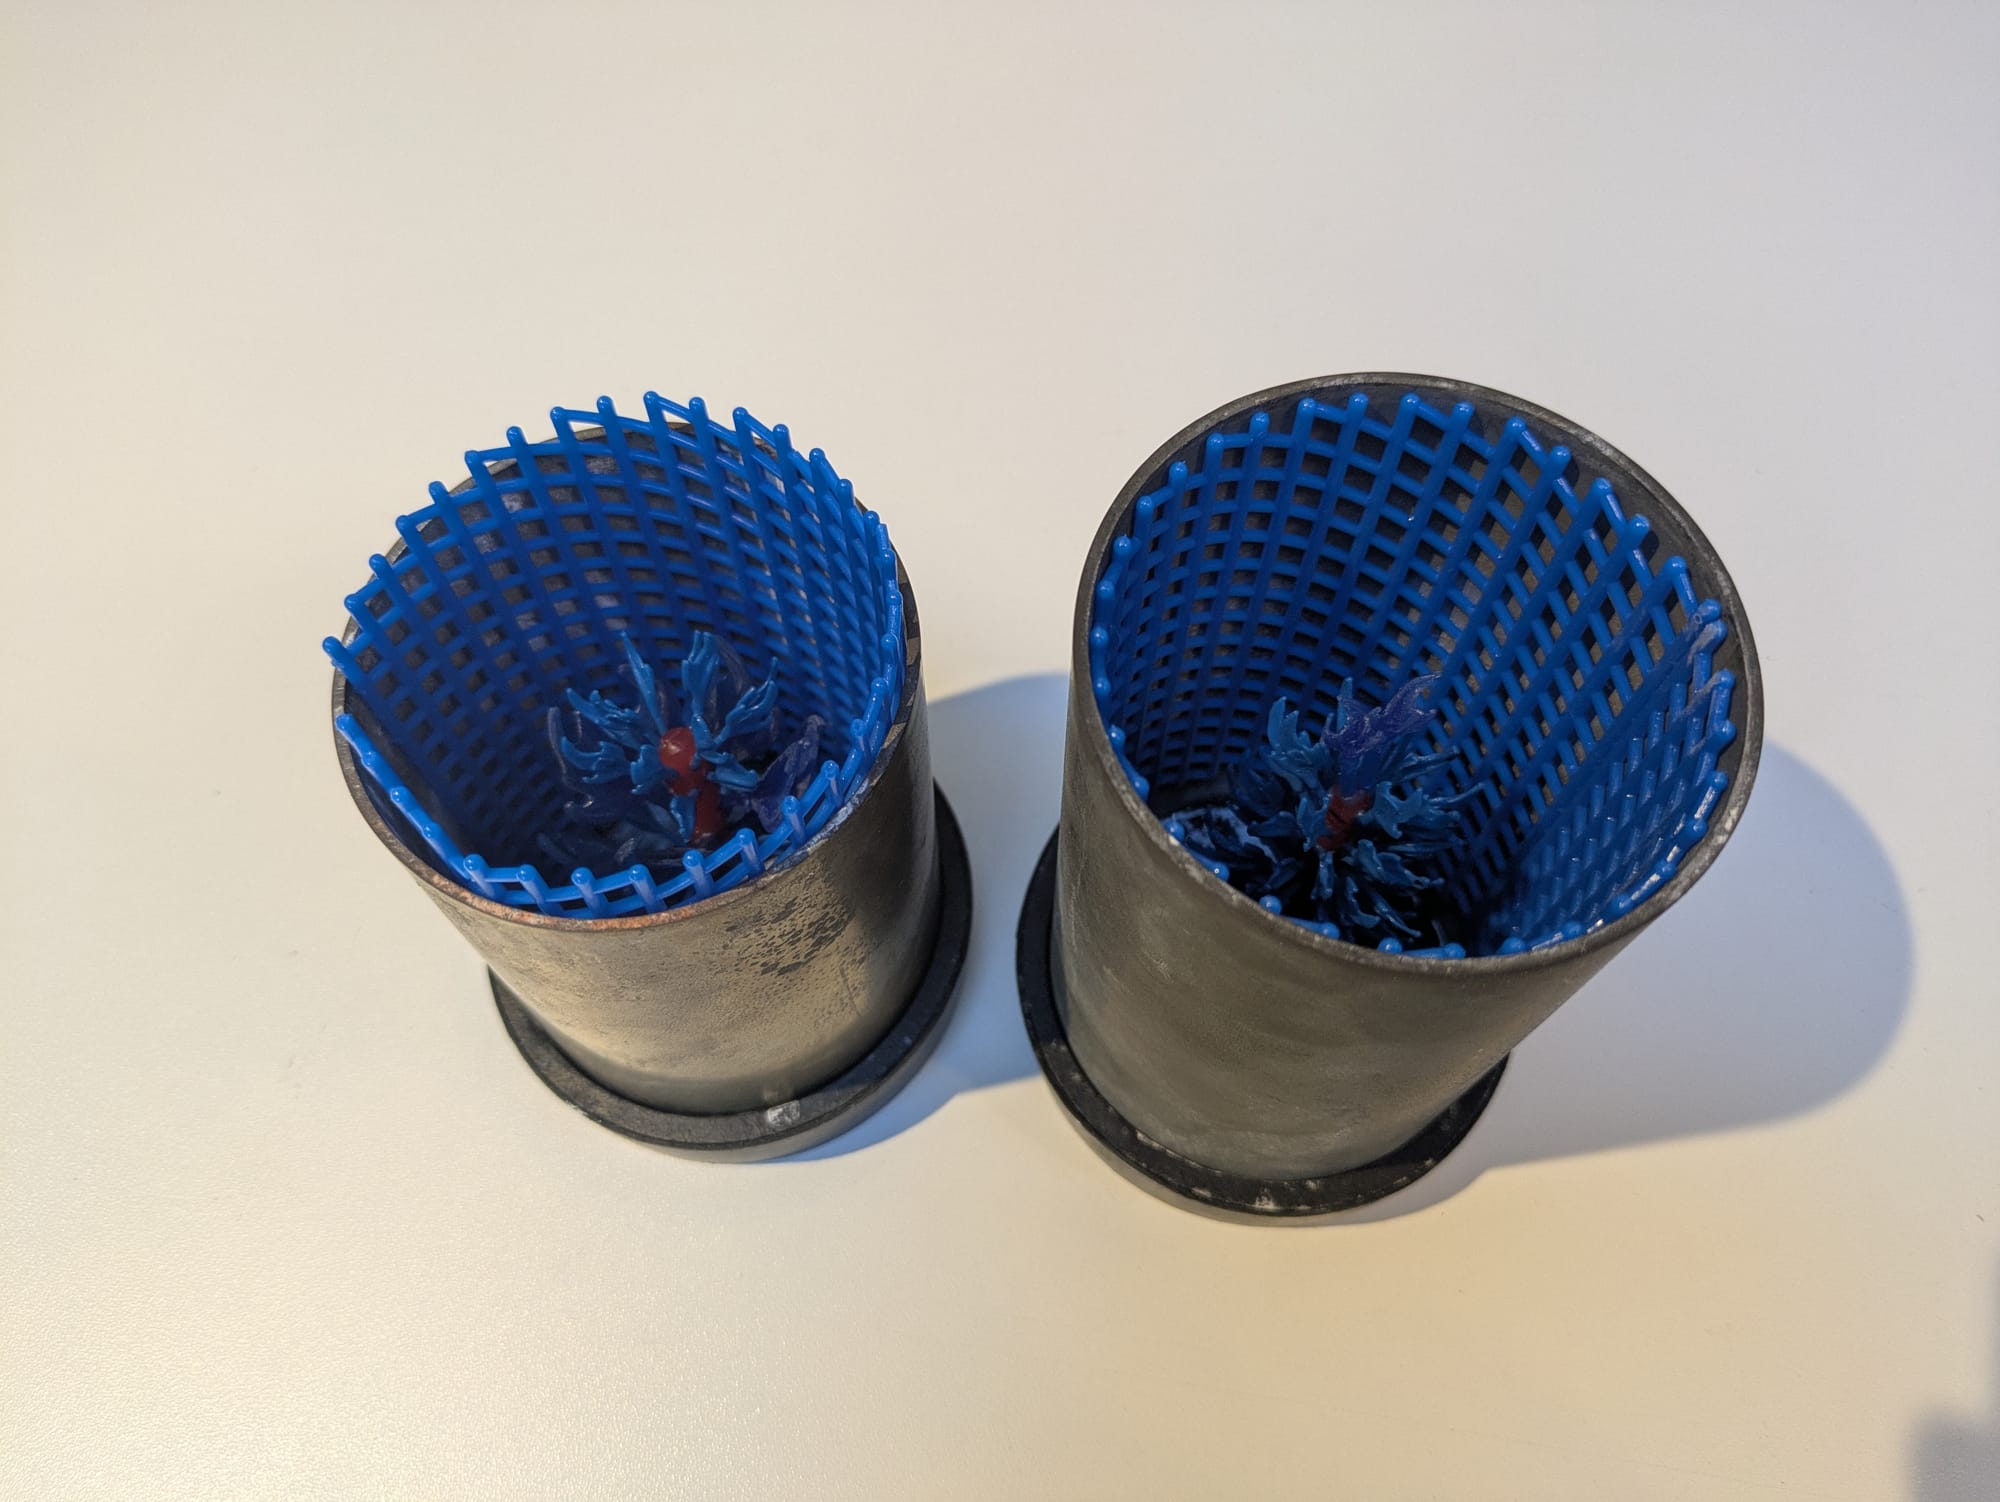
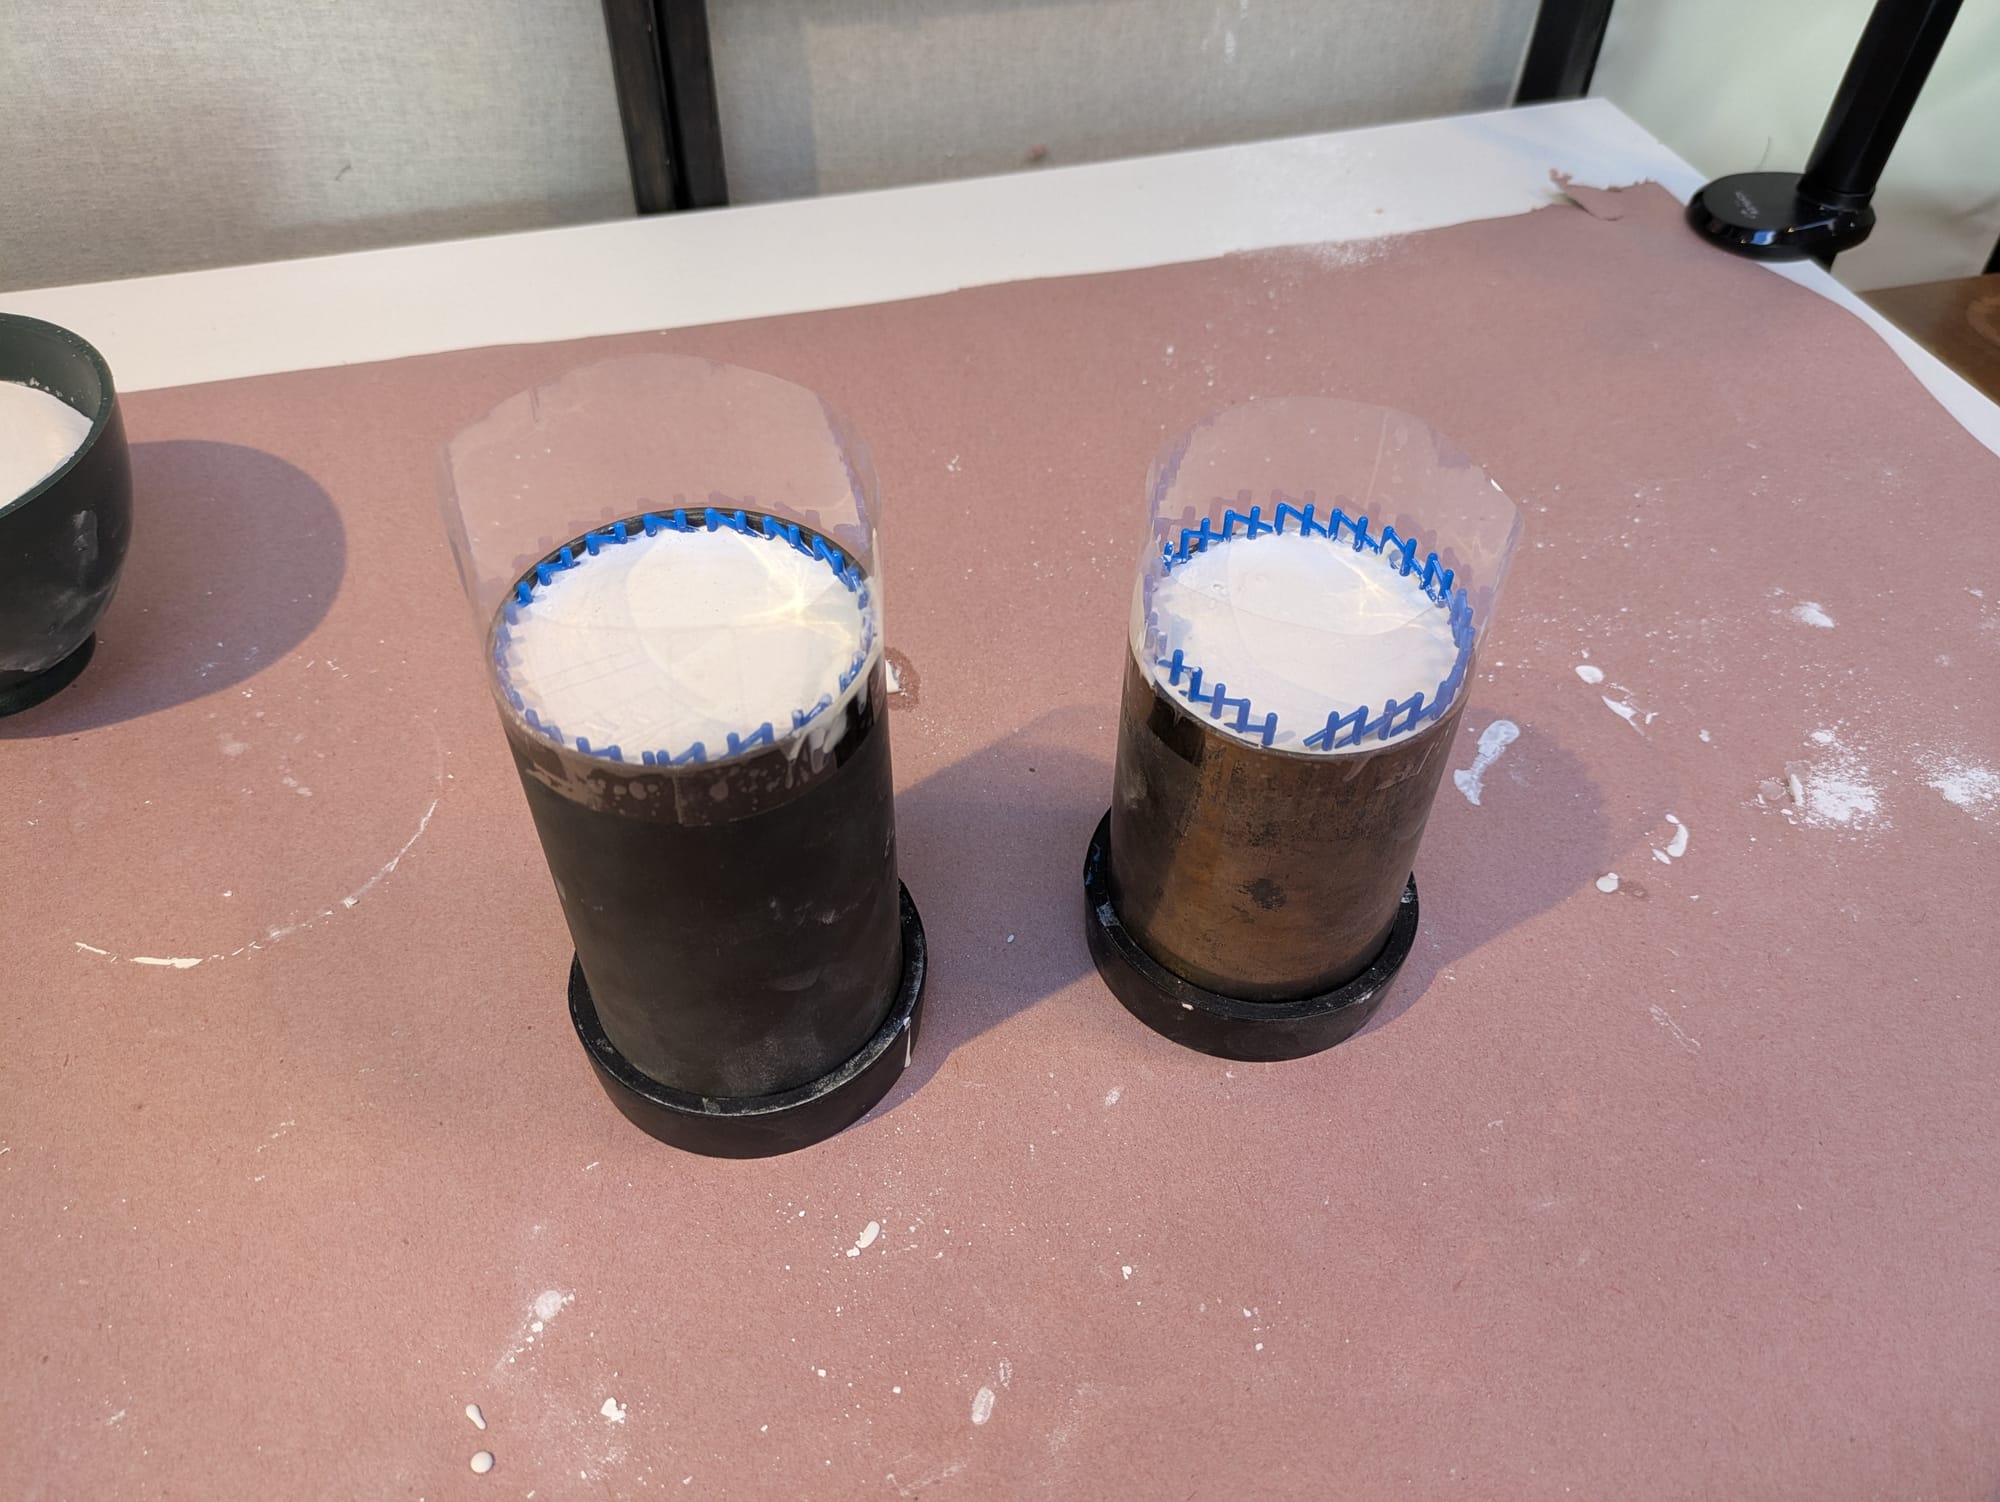
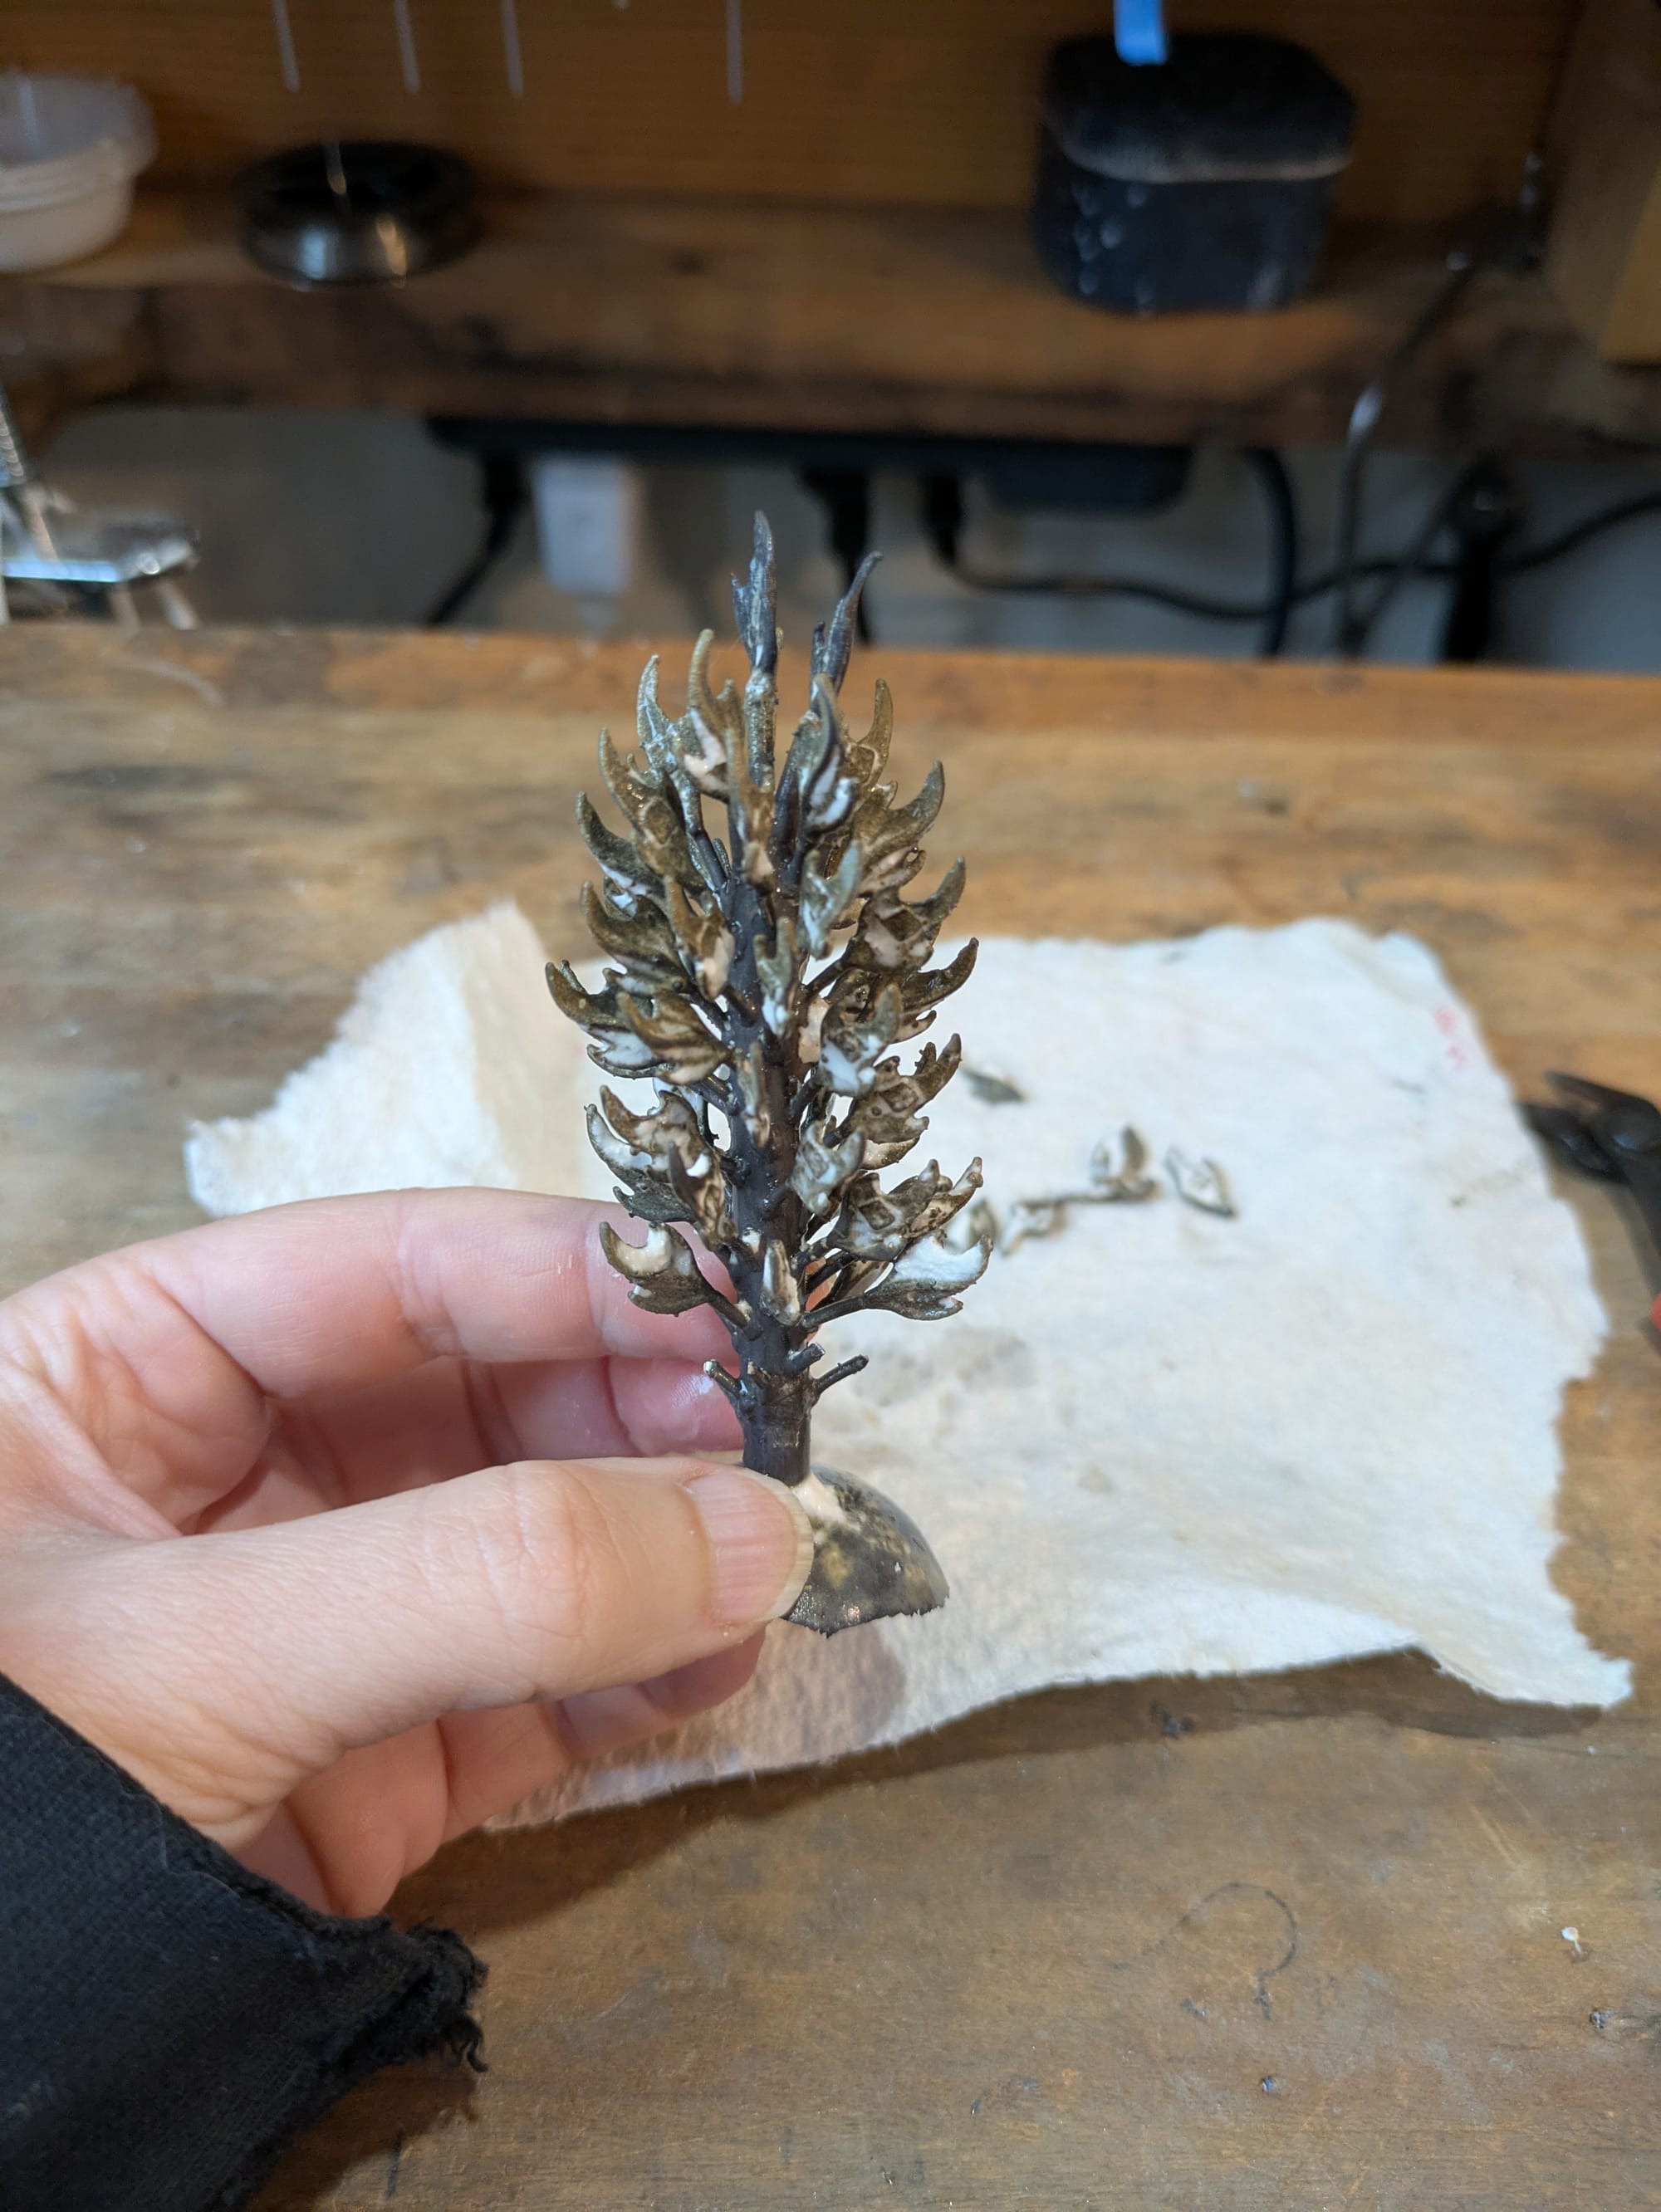
Gallery: two 'trees' made of wax models that stick out from central wax rods, is is about 4" and the other 5" tall; the two trees in their steel cylinders (flasks); and those two flasks filled with investment, which is much like plaster.
Day 3 (Wednesday):
Casting went really smoothly! Casting takes all day, but most of that is running and monitoring the kiln. The first flask cast perfectly, the second flask appeared to be missing only two small waxes. (I did start de-spruing the first tree before I remembered to take a photo, which is why it has a few naked stems at the bottom.)
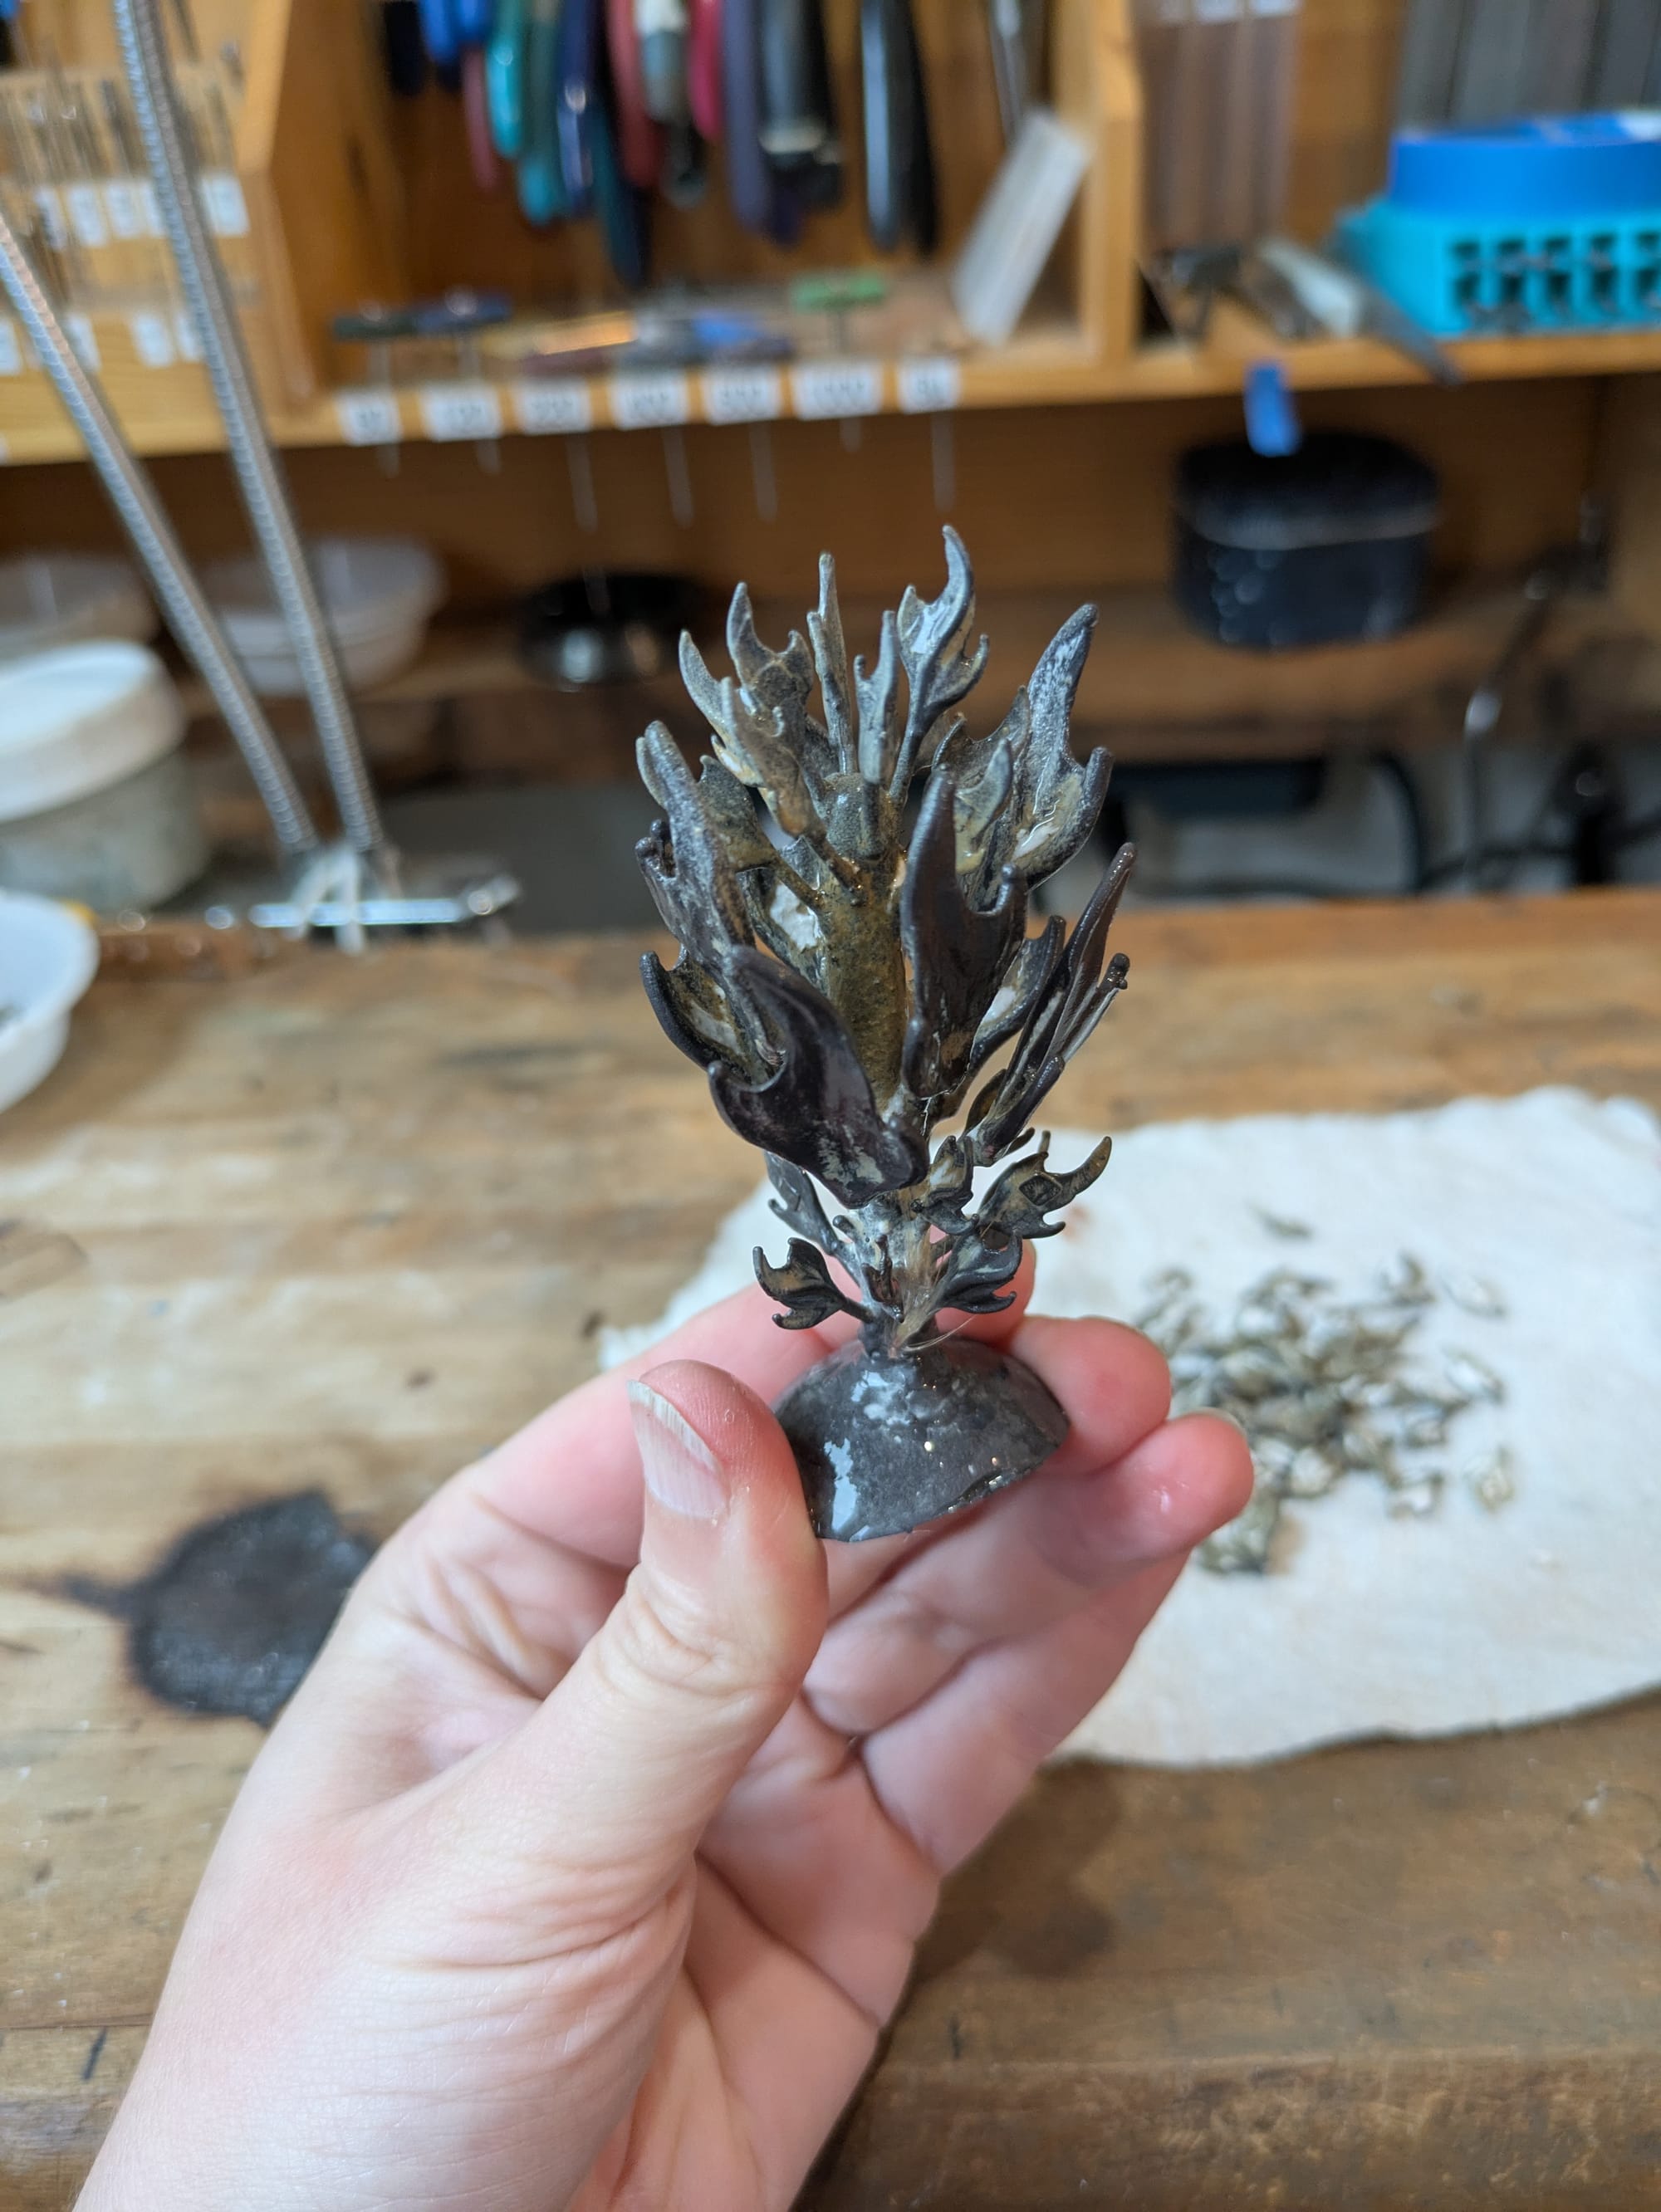
Gallery: a photo of each tree, now cast into solid metal. They're dark from the heat and still dirty with investment.
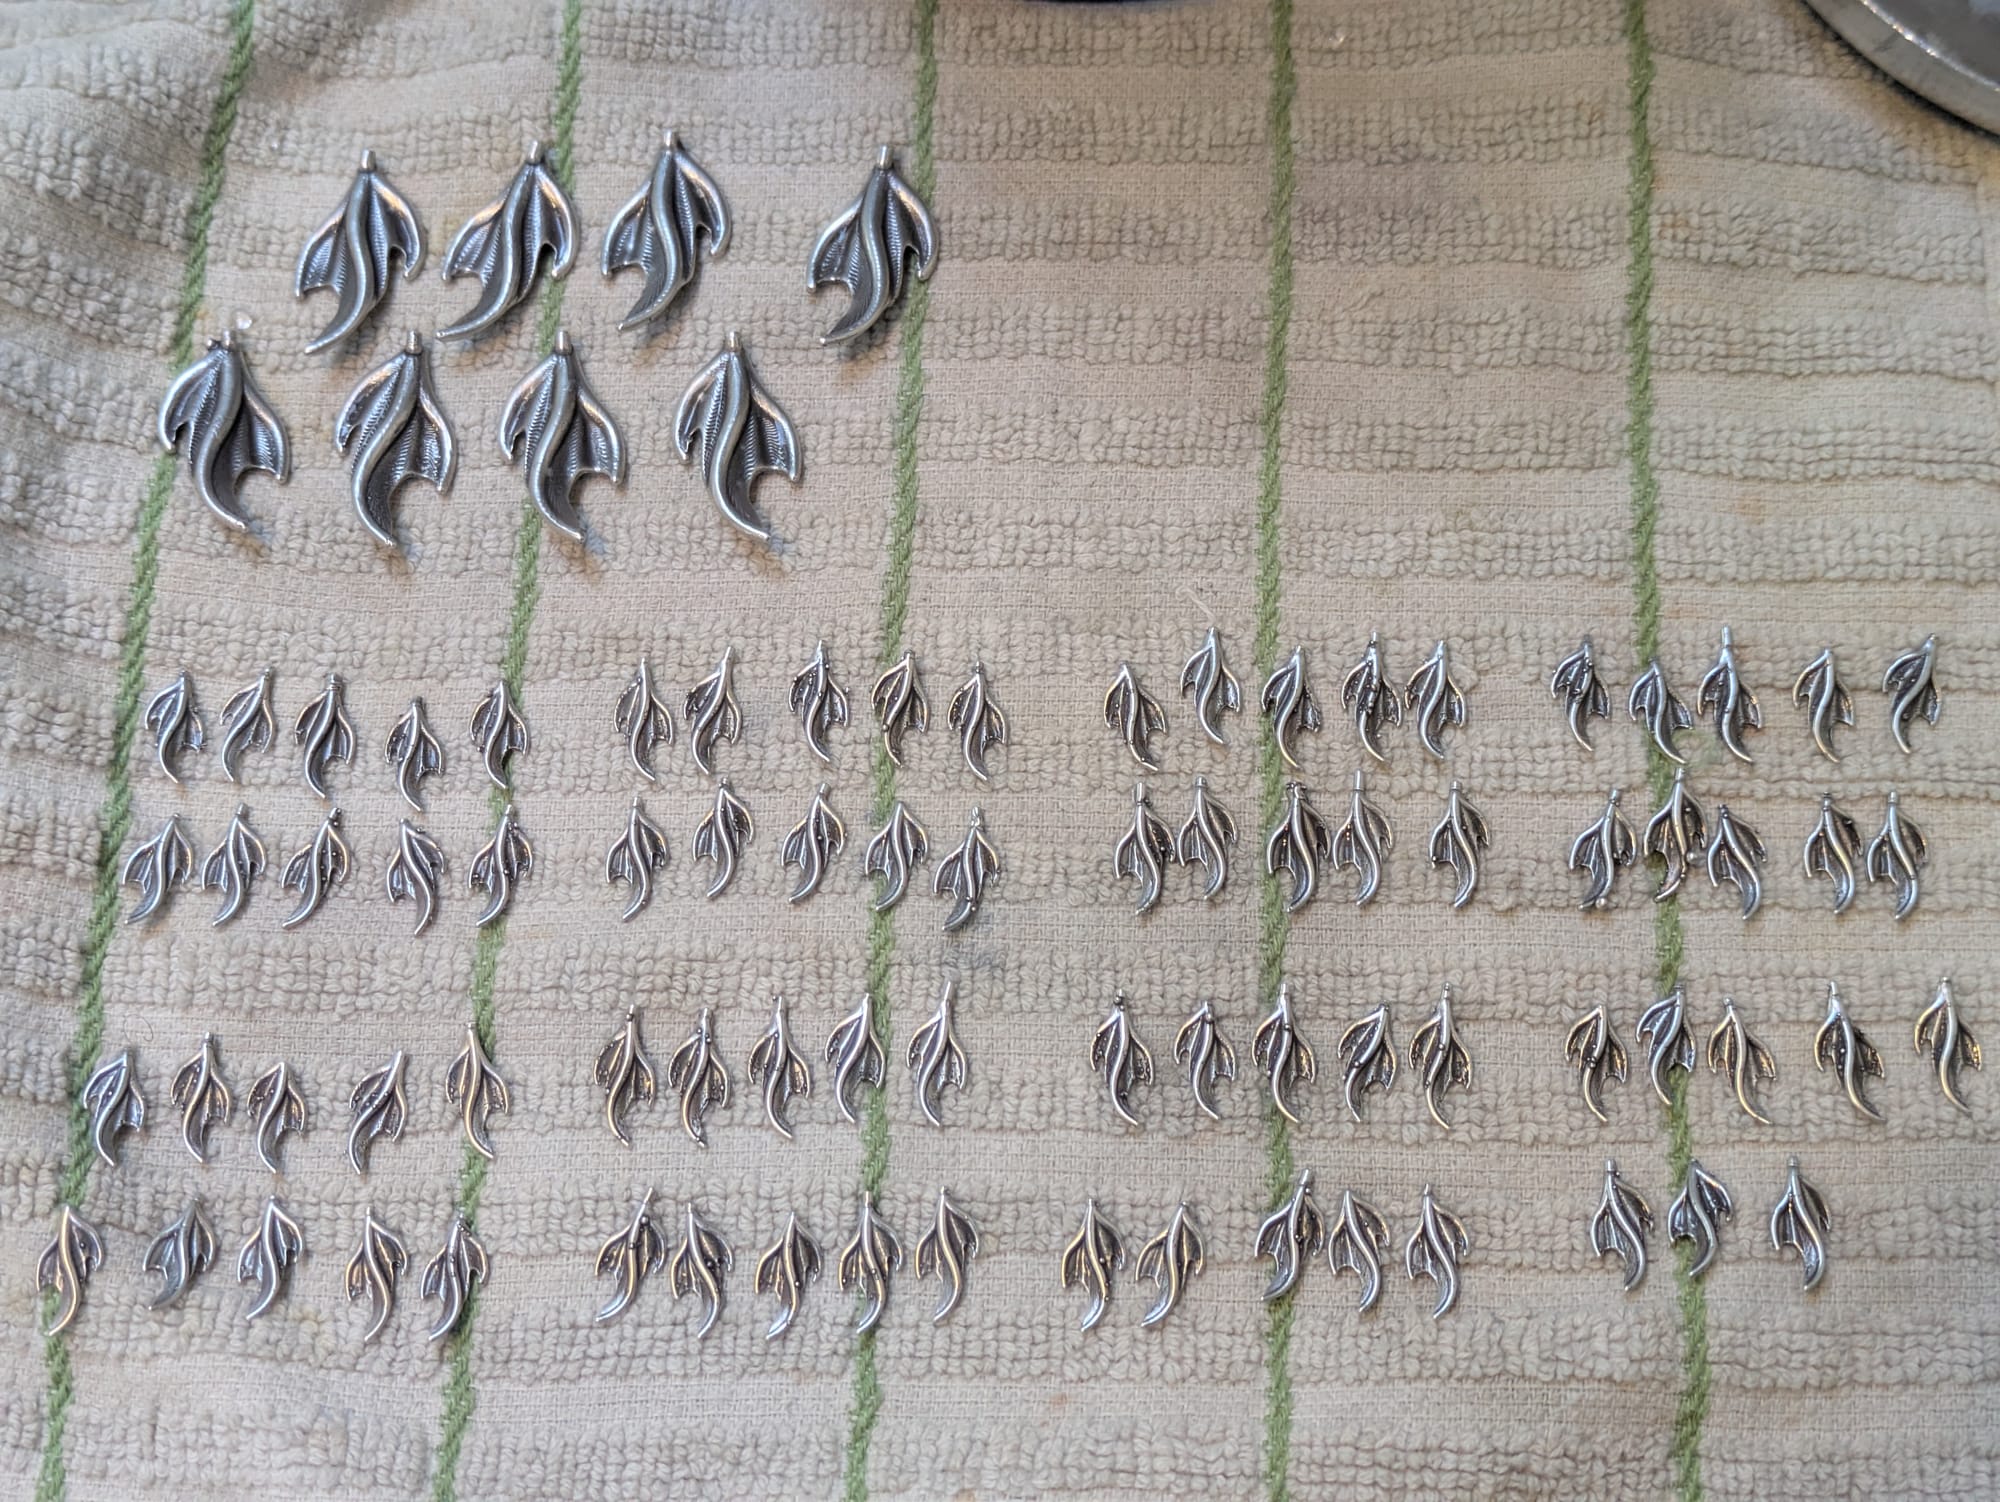
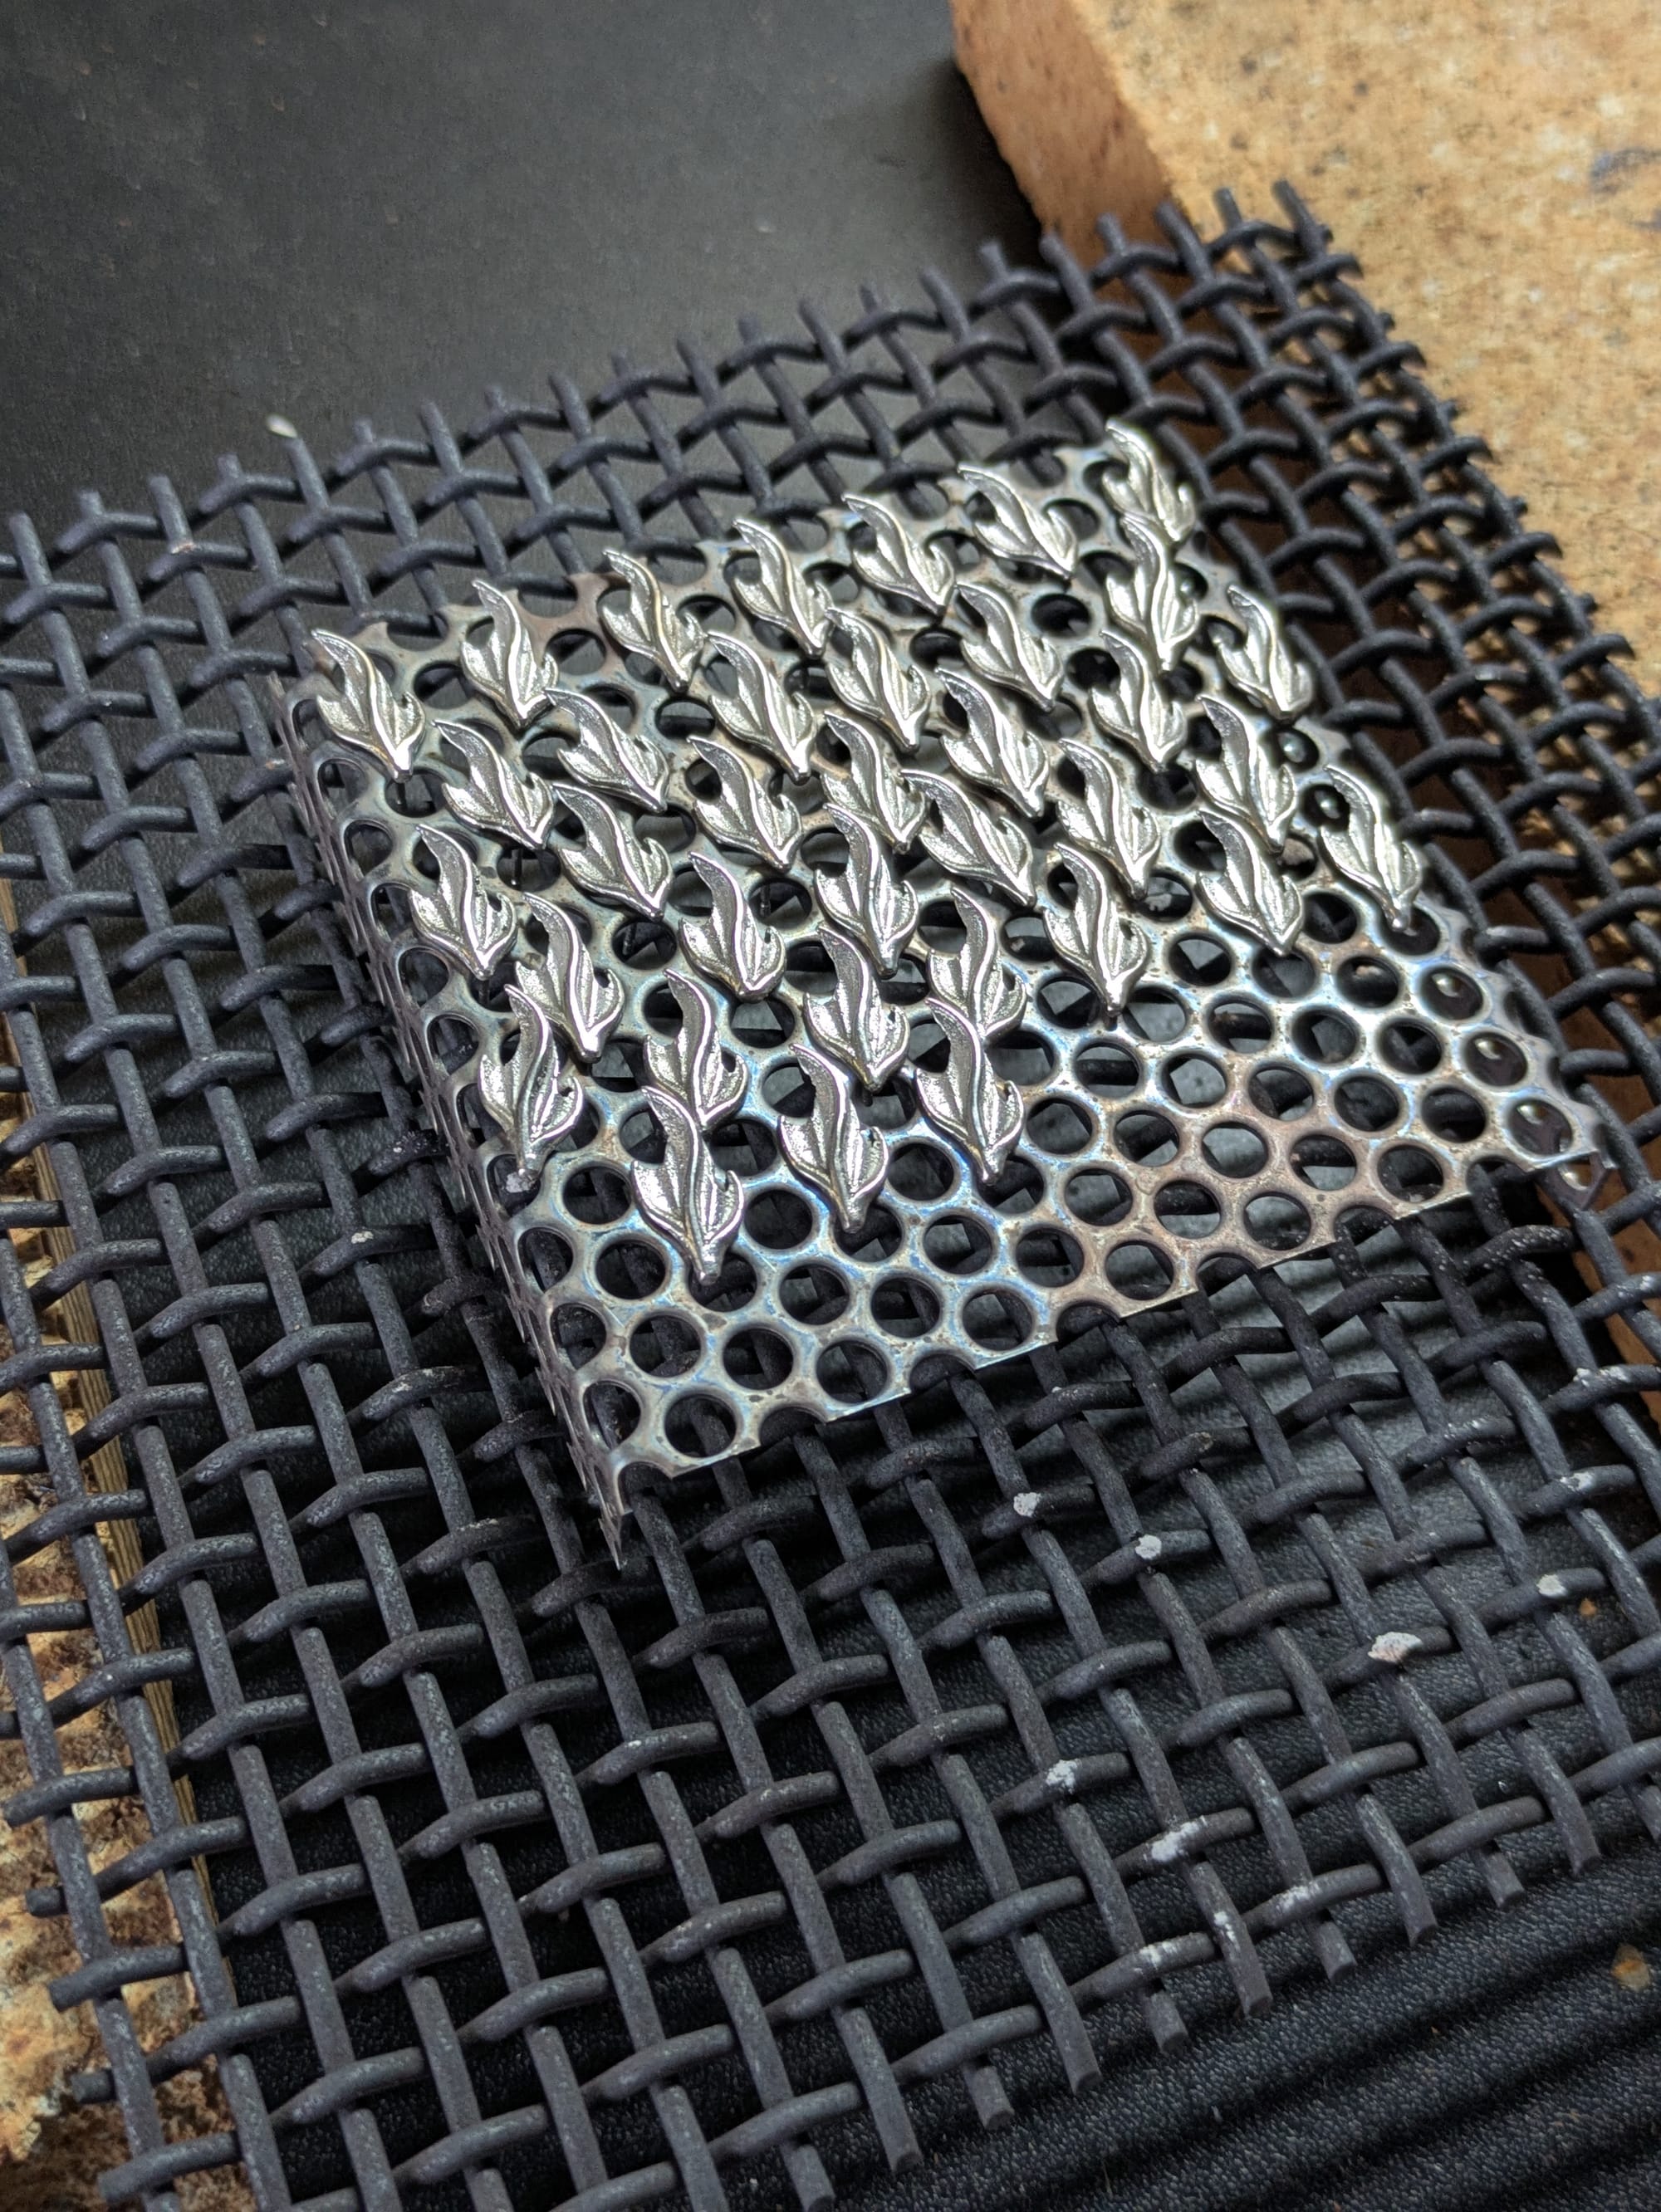
There's a lot of silver in the tree trunk, but it can all be cleaned and used again for another casting. The fins are cut off and tossed in a tumbler with mild grit, they'll spend the night getting the black casting crud gently scrubbed off.
Day 4 (Thursday Friday):
(I lost Thursday to appointments and paperwork, so everything got shifted by a day.)
Here is where the volume of this project began to catch up with me. Waxes are easy, spruing is zen, casting takes the same amount of time and effort whether I'm casting 1 flask or 4. But now all these little silver pieces need finishing.
I use a couple of dremel tools to remove any remaining sprue branch and smooth the end, clear off any casting bubbles or defects, and smooth the surface. Then each one gets an earring post soldered on. I learned that trying to do so many pieces (now 36 pairs, or 72 pieces total) in one day is really rough on the wrists.
But look, I made GIFs!
Day 5 (Monday):
I thought of this as "Enameling Day!" but really, the first 4 hours were reduction gilding. This is a process that removes copper from the surface, leaving a thin layer of fine silver behind that won't oxidize in the kiln when the enamel goes on. And it takes a minute.
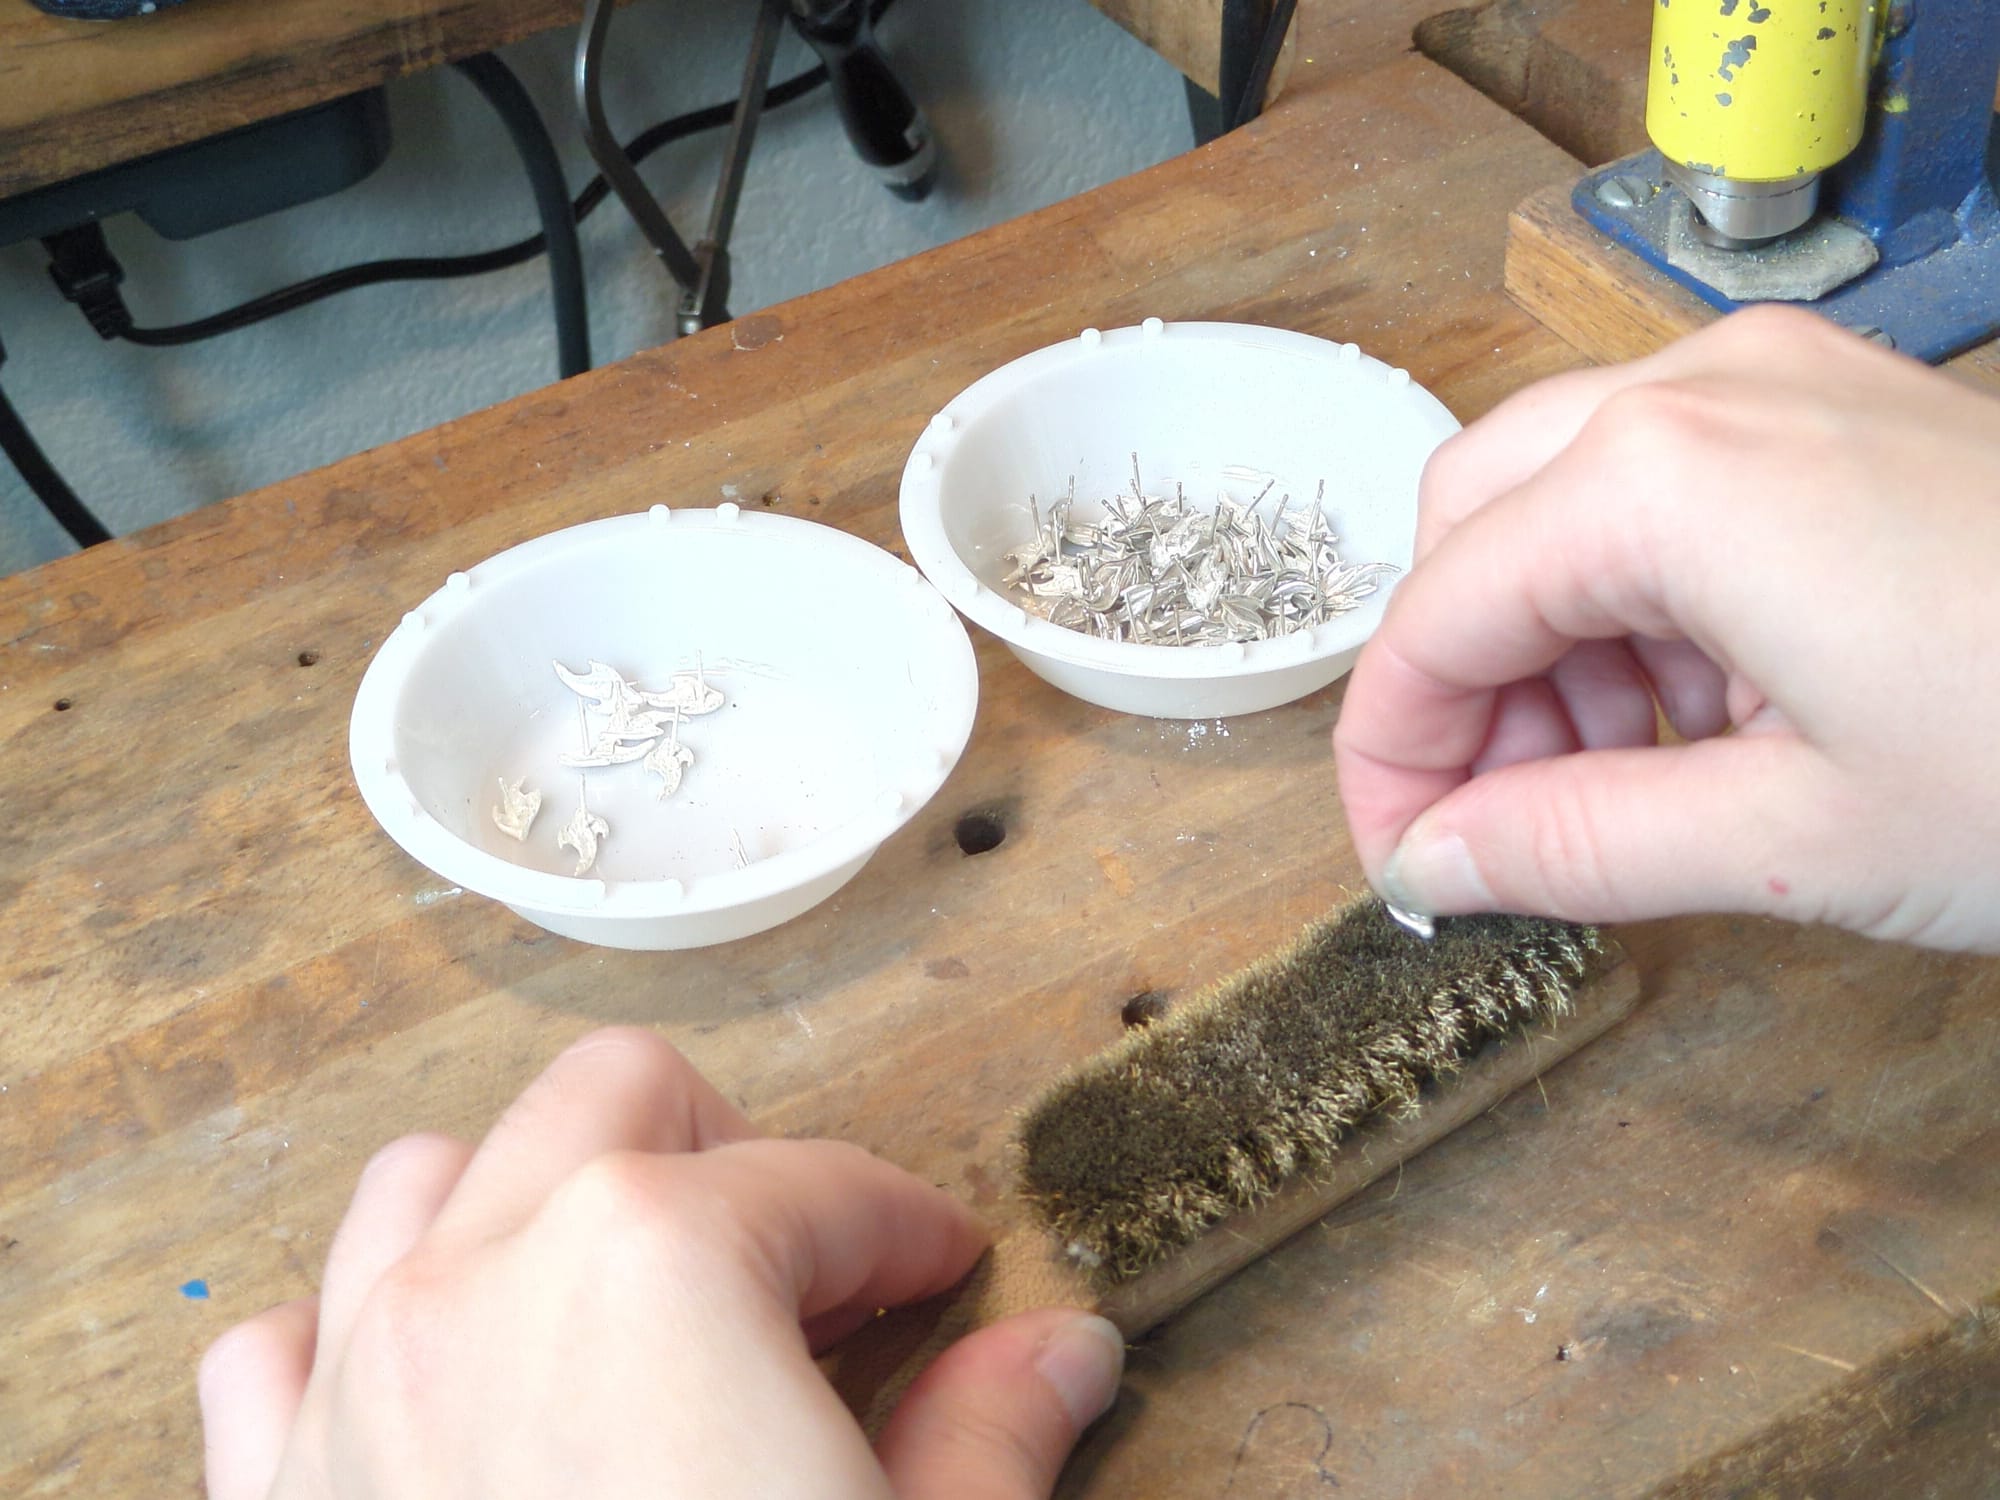
Gallery of two parts of the gilding process; many fins on a metal tray for the kiln, and a brass brush being used to buff each piece after heating. This gets repeated a few times.
But then! Color time!
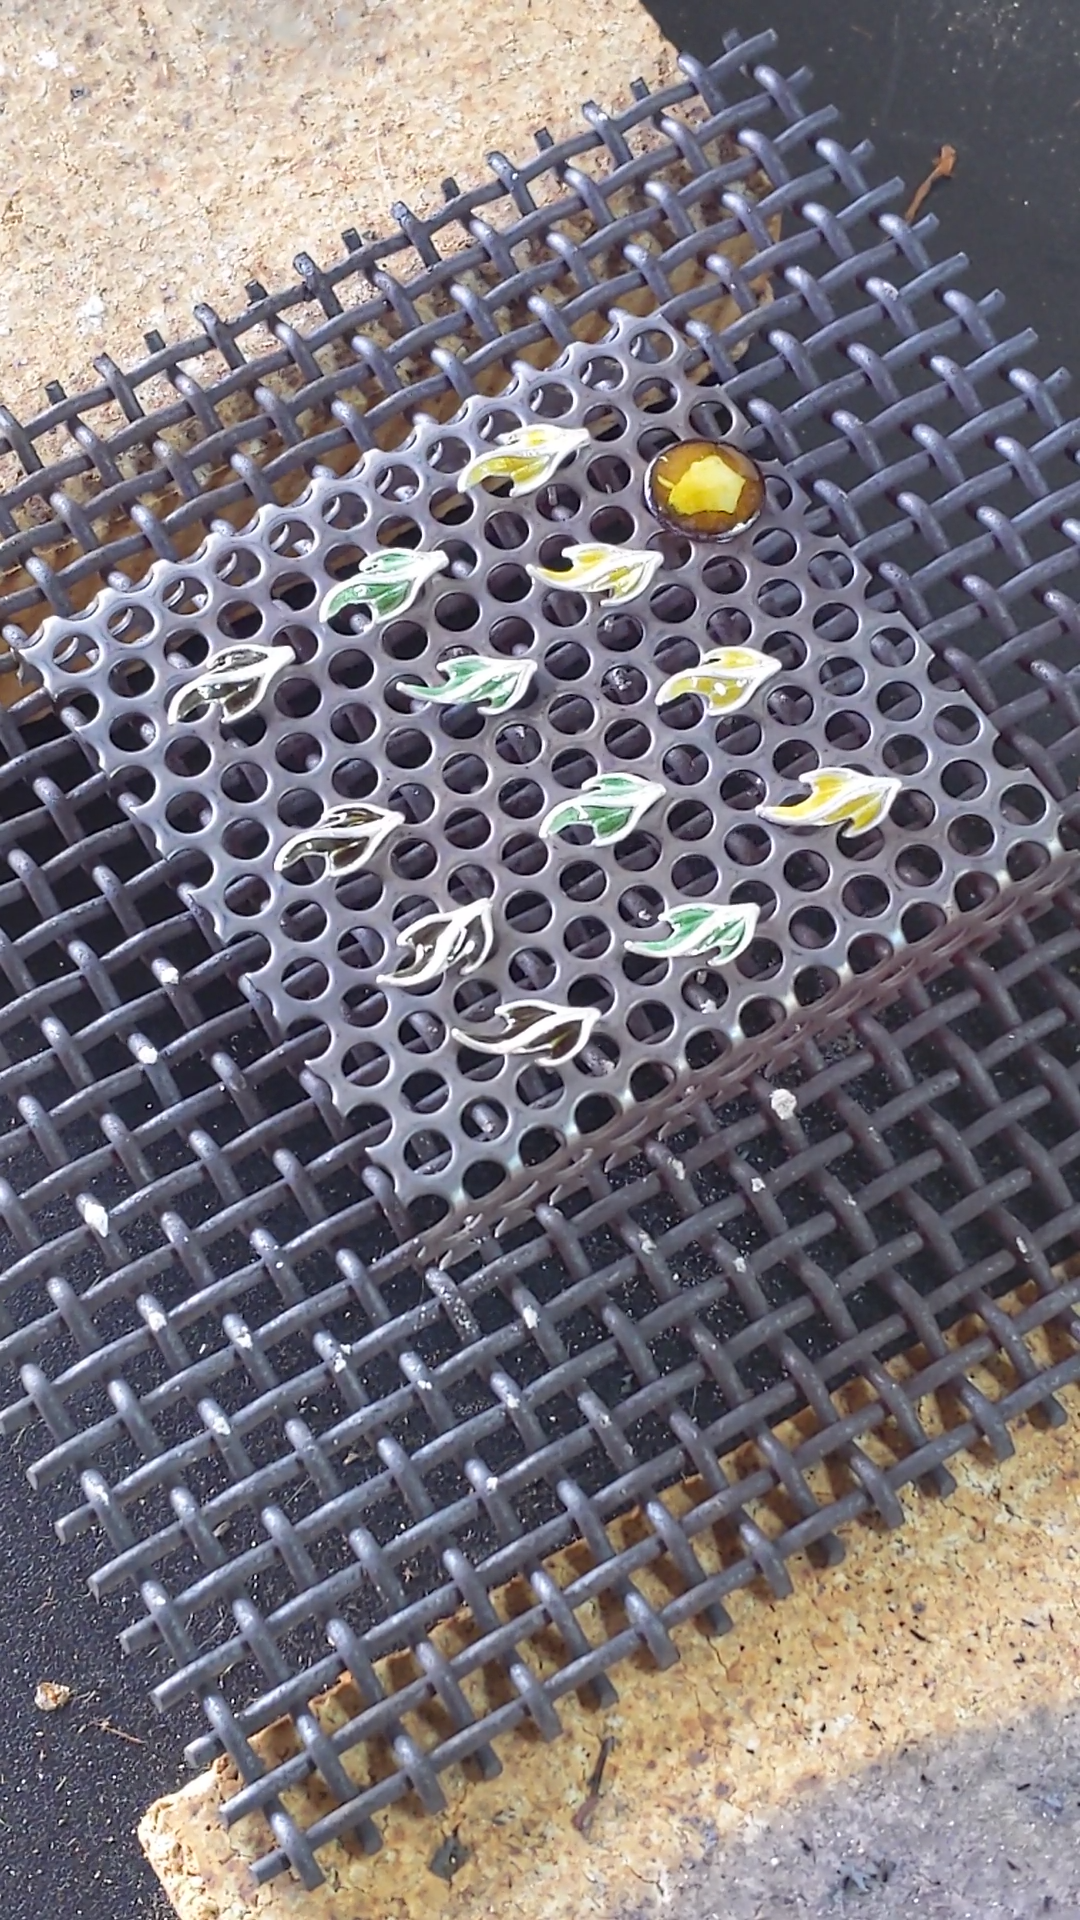
Results:
First let me show you what didn't work.
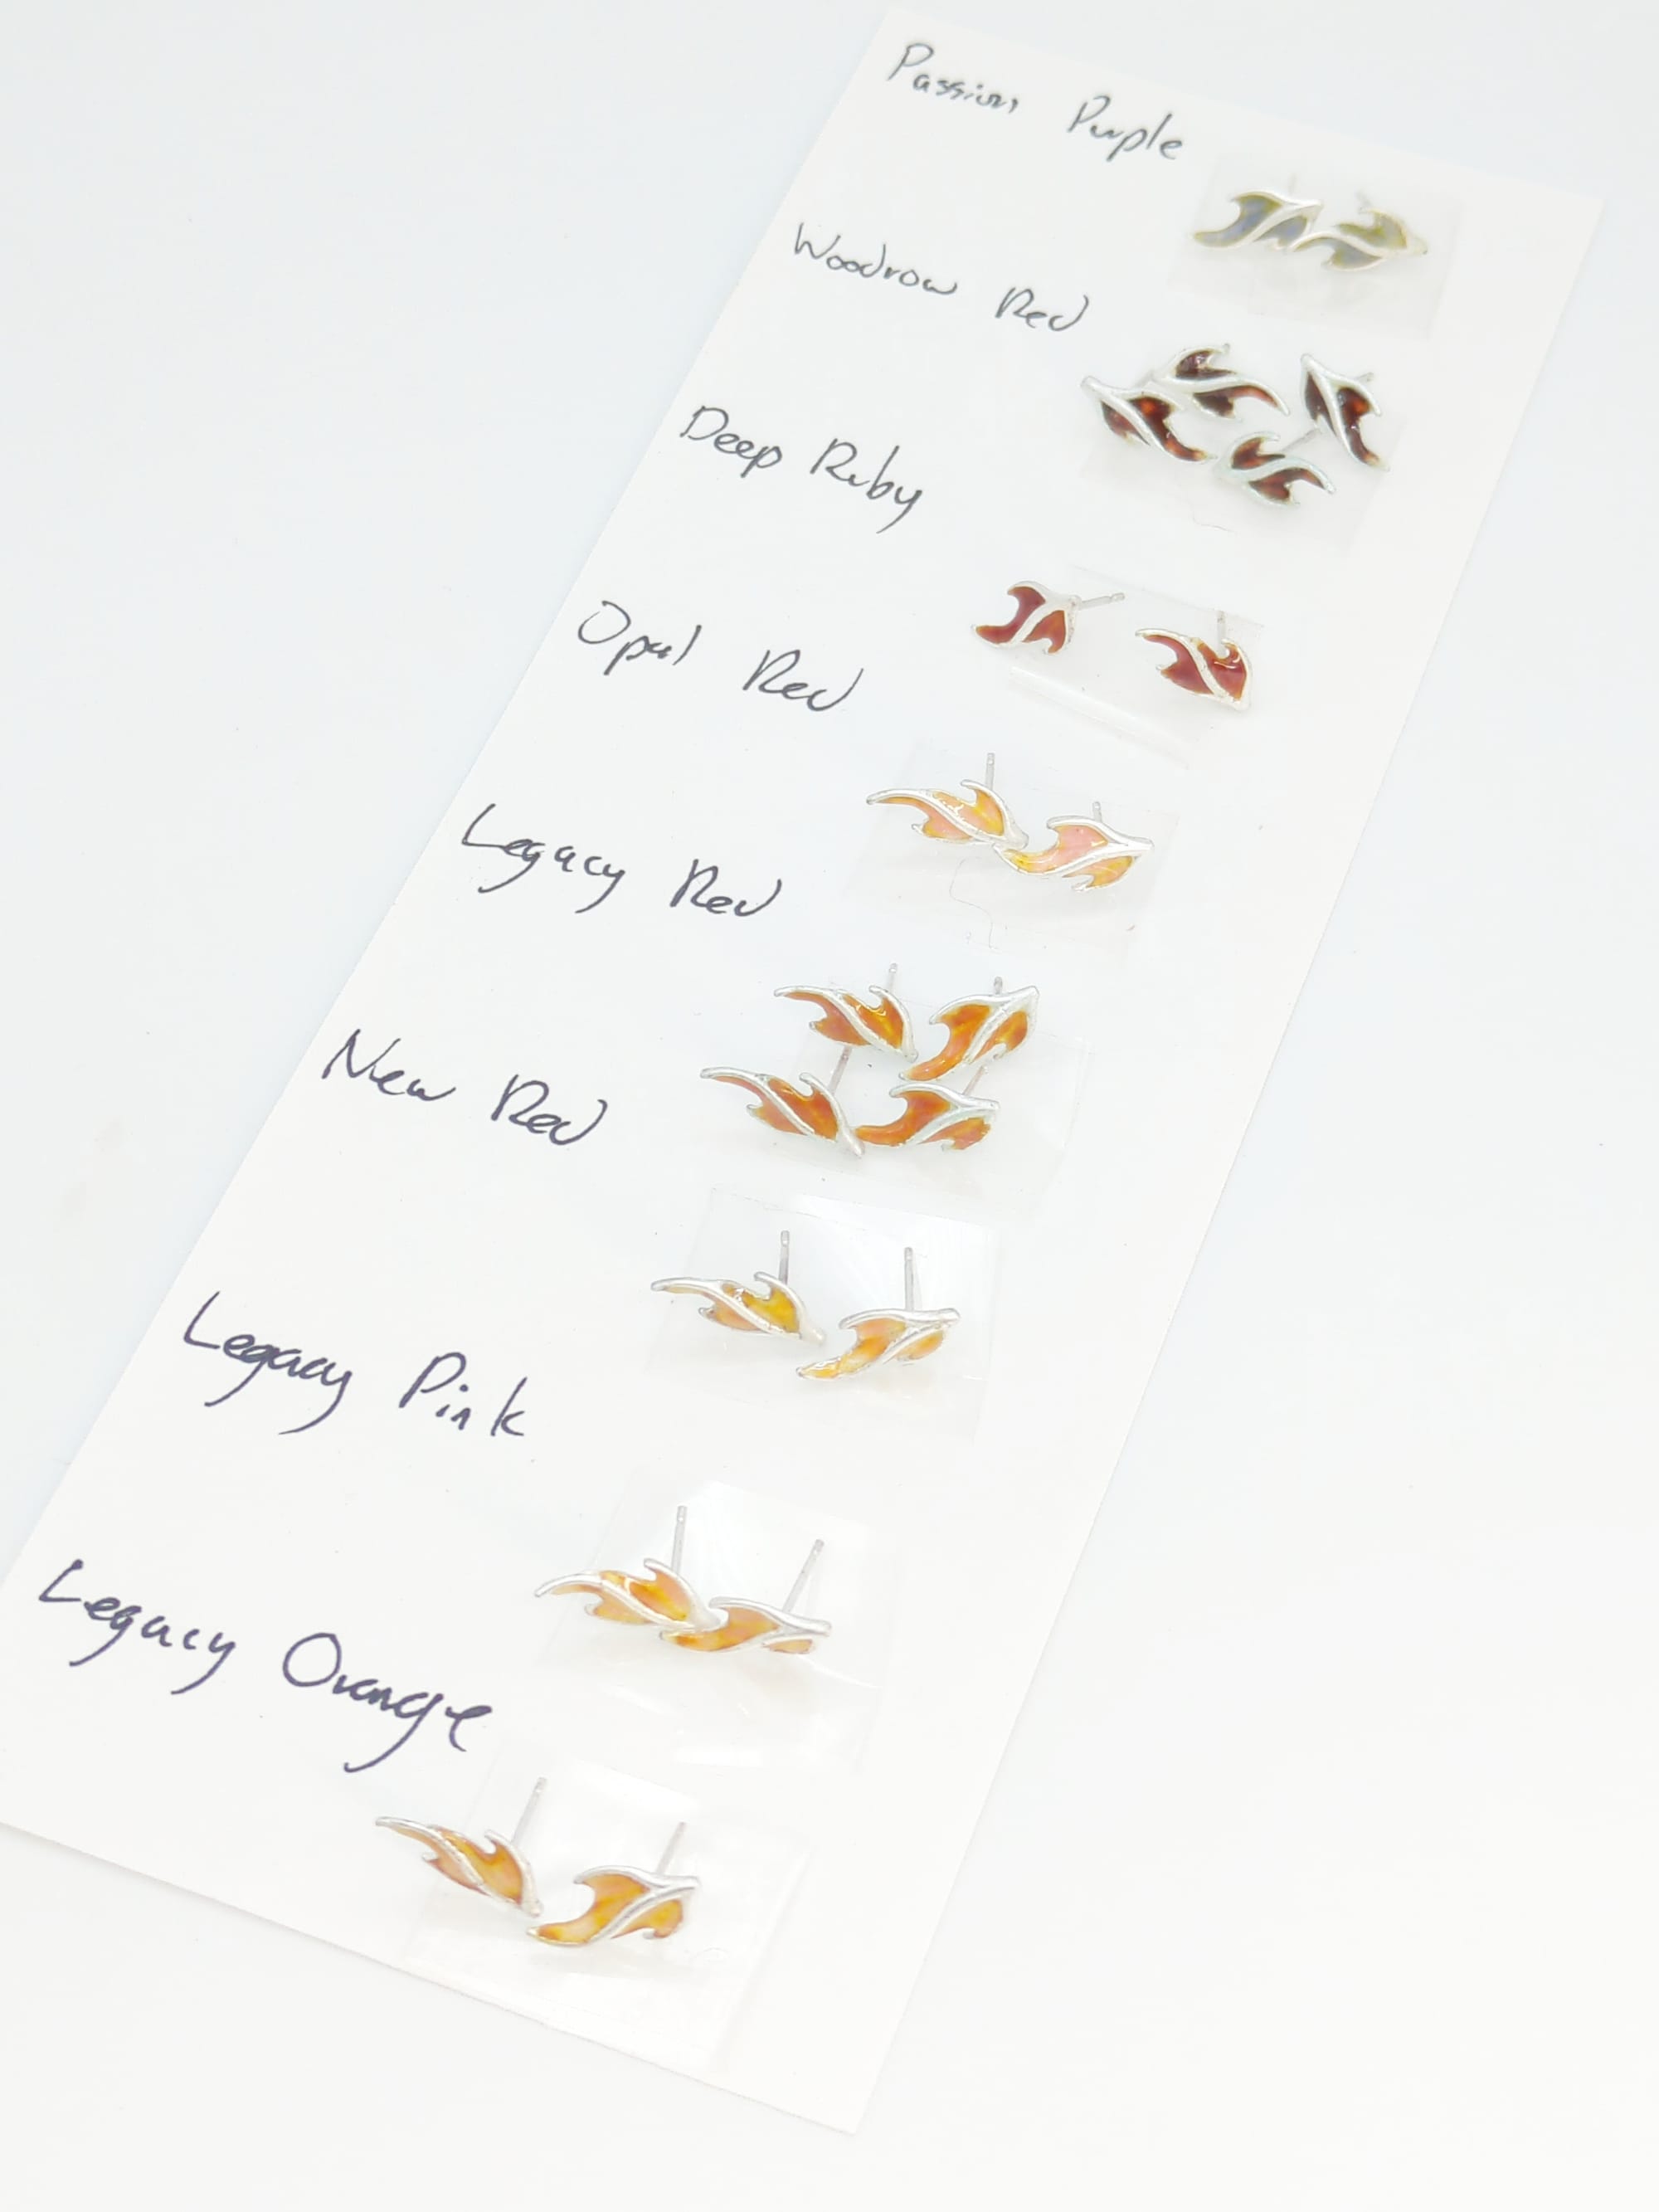
All of these are reactive colors; the enamel reacts (usually badly) to contact with silver. I did put a layer of clear enamel on each of these before adding the color. So why didn't they work?
Some got close. The Passion Purple at the top is mostly purple, but has yellow edges. Woodrow Red is patchy for reasons I don't know. The Deep Ruby is the closest to a strong cherry red I've gotten so far! But its a little dark, and it cracked while cooling. 🤷
For the rest, my best guess is that the clear coat wasn't thick enough or broad enough. The way they discolor makes me think the chemical reaction caused by the silver spreads somewhat through the adjacent enamel, and these bits are just too small to pack in enough buffer.
Now the good stuff!
REDS
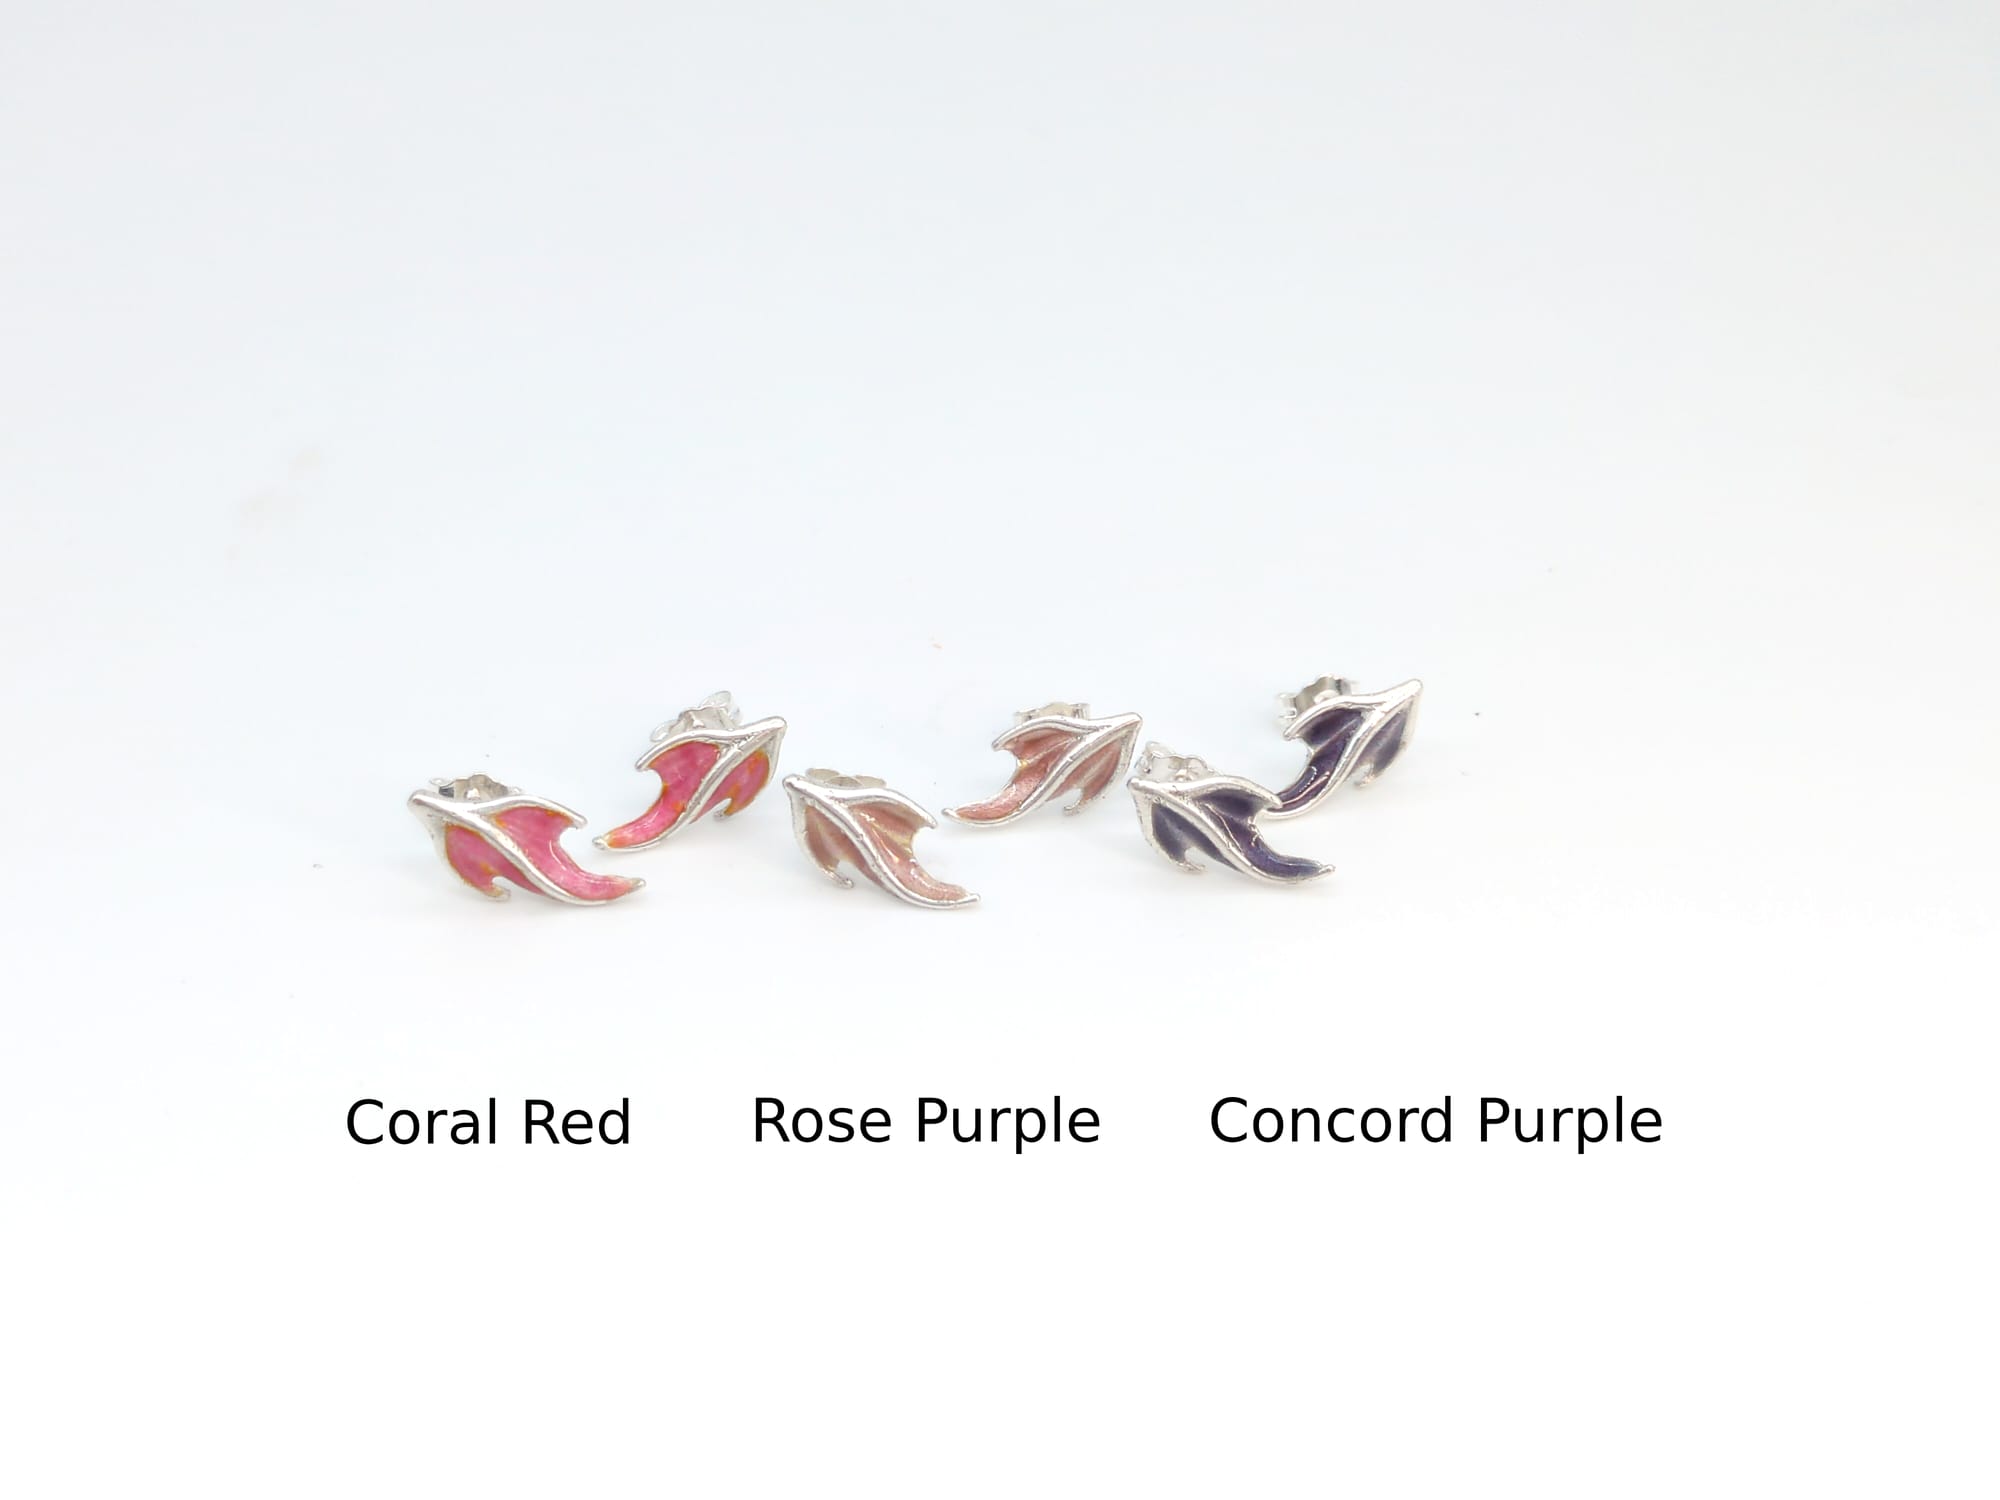
The Coral Red shows a few patches of yellow from silver reaction, but is generally bright and clear, so I'll allow it 🙃
YELLOWS
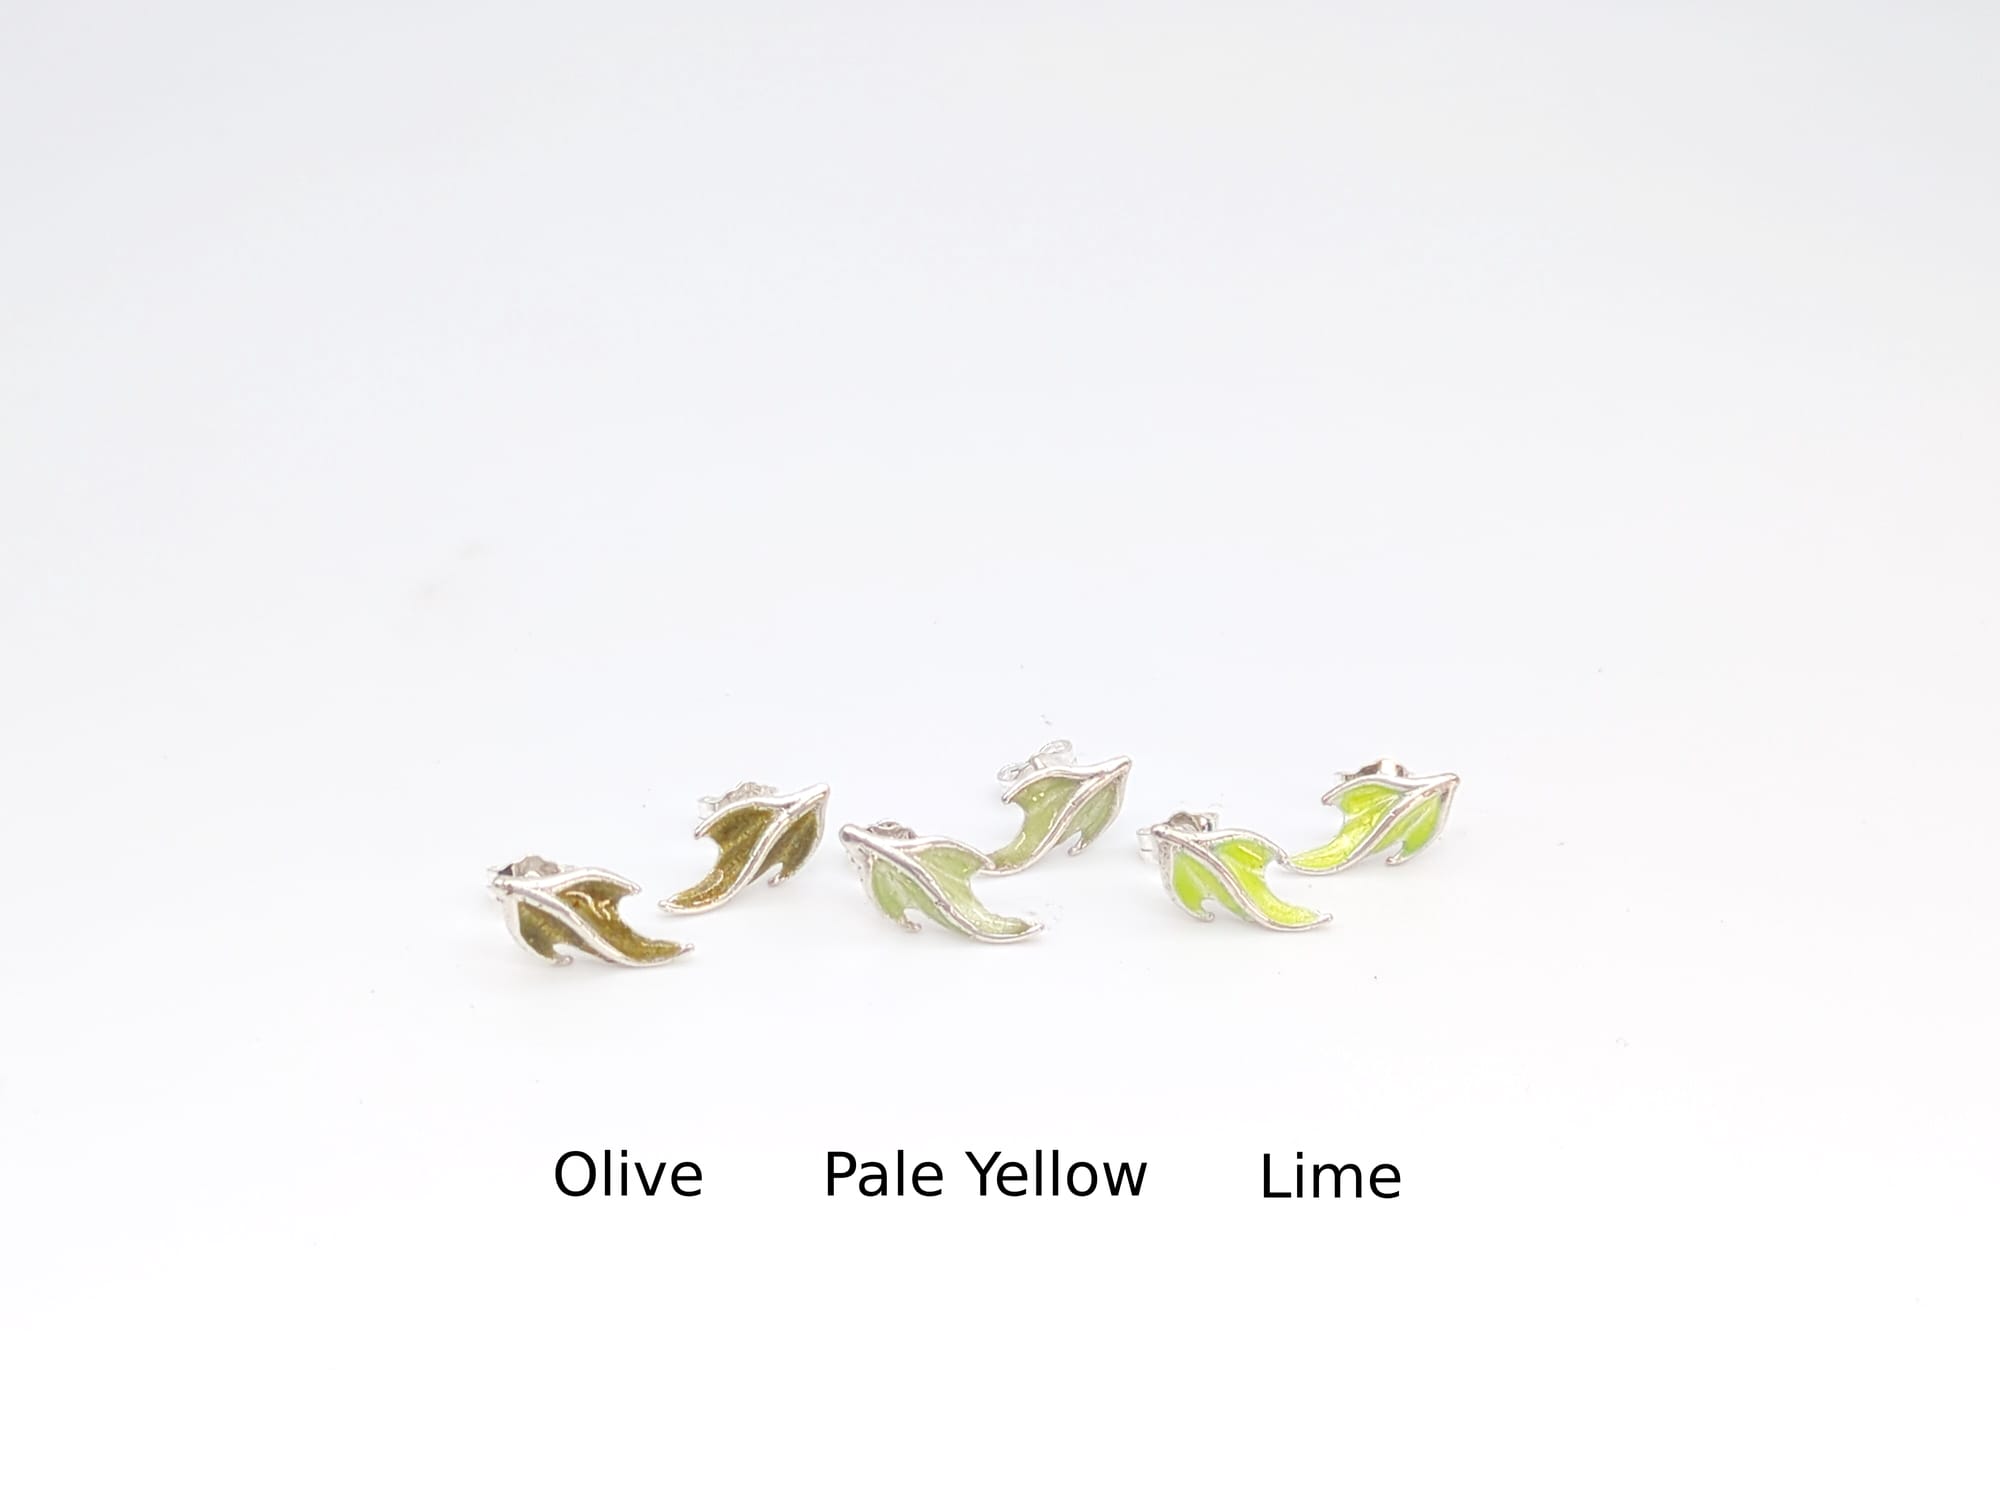
This "olive" is actually also a reactive color.. It was supposed to be Dark Lavender 😬 But the olive green color is pretty nice, I actually really like it.
I don't know if this photo does justice to the Lime color. It is very slightly green and very slightly neon. Frankly it is precisely the color of Mountain Dew.
GREENS
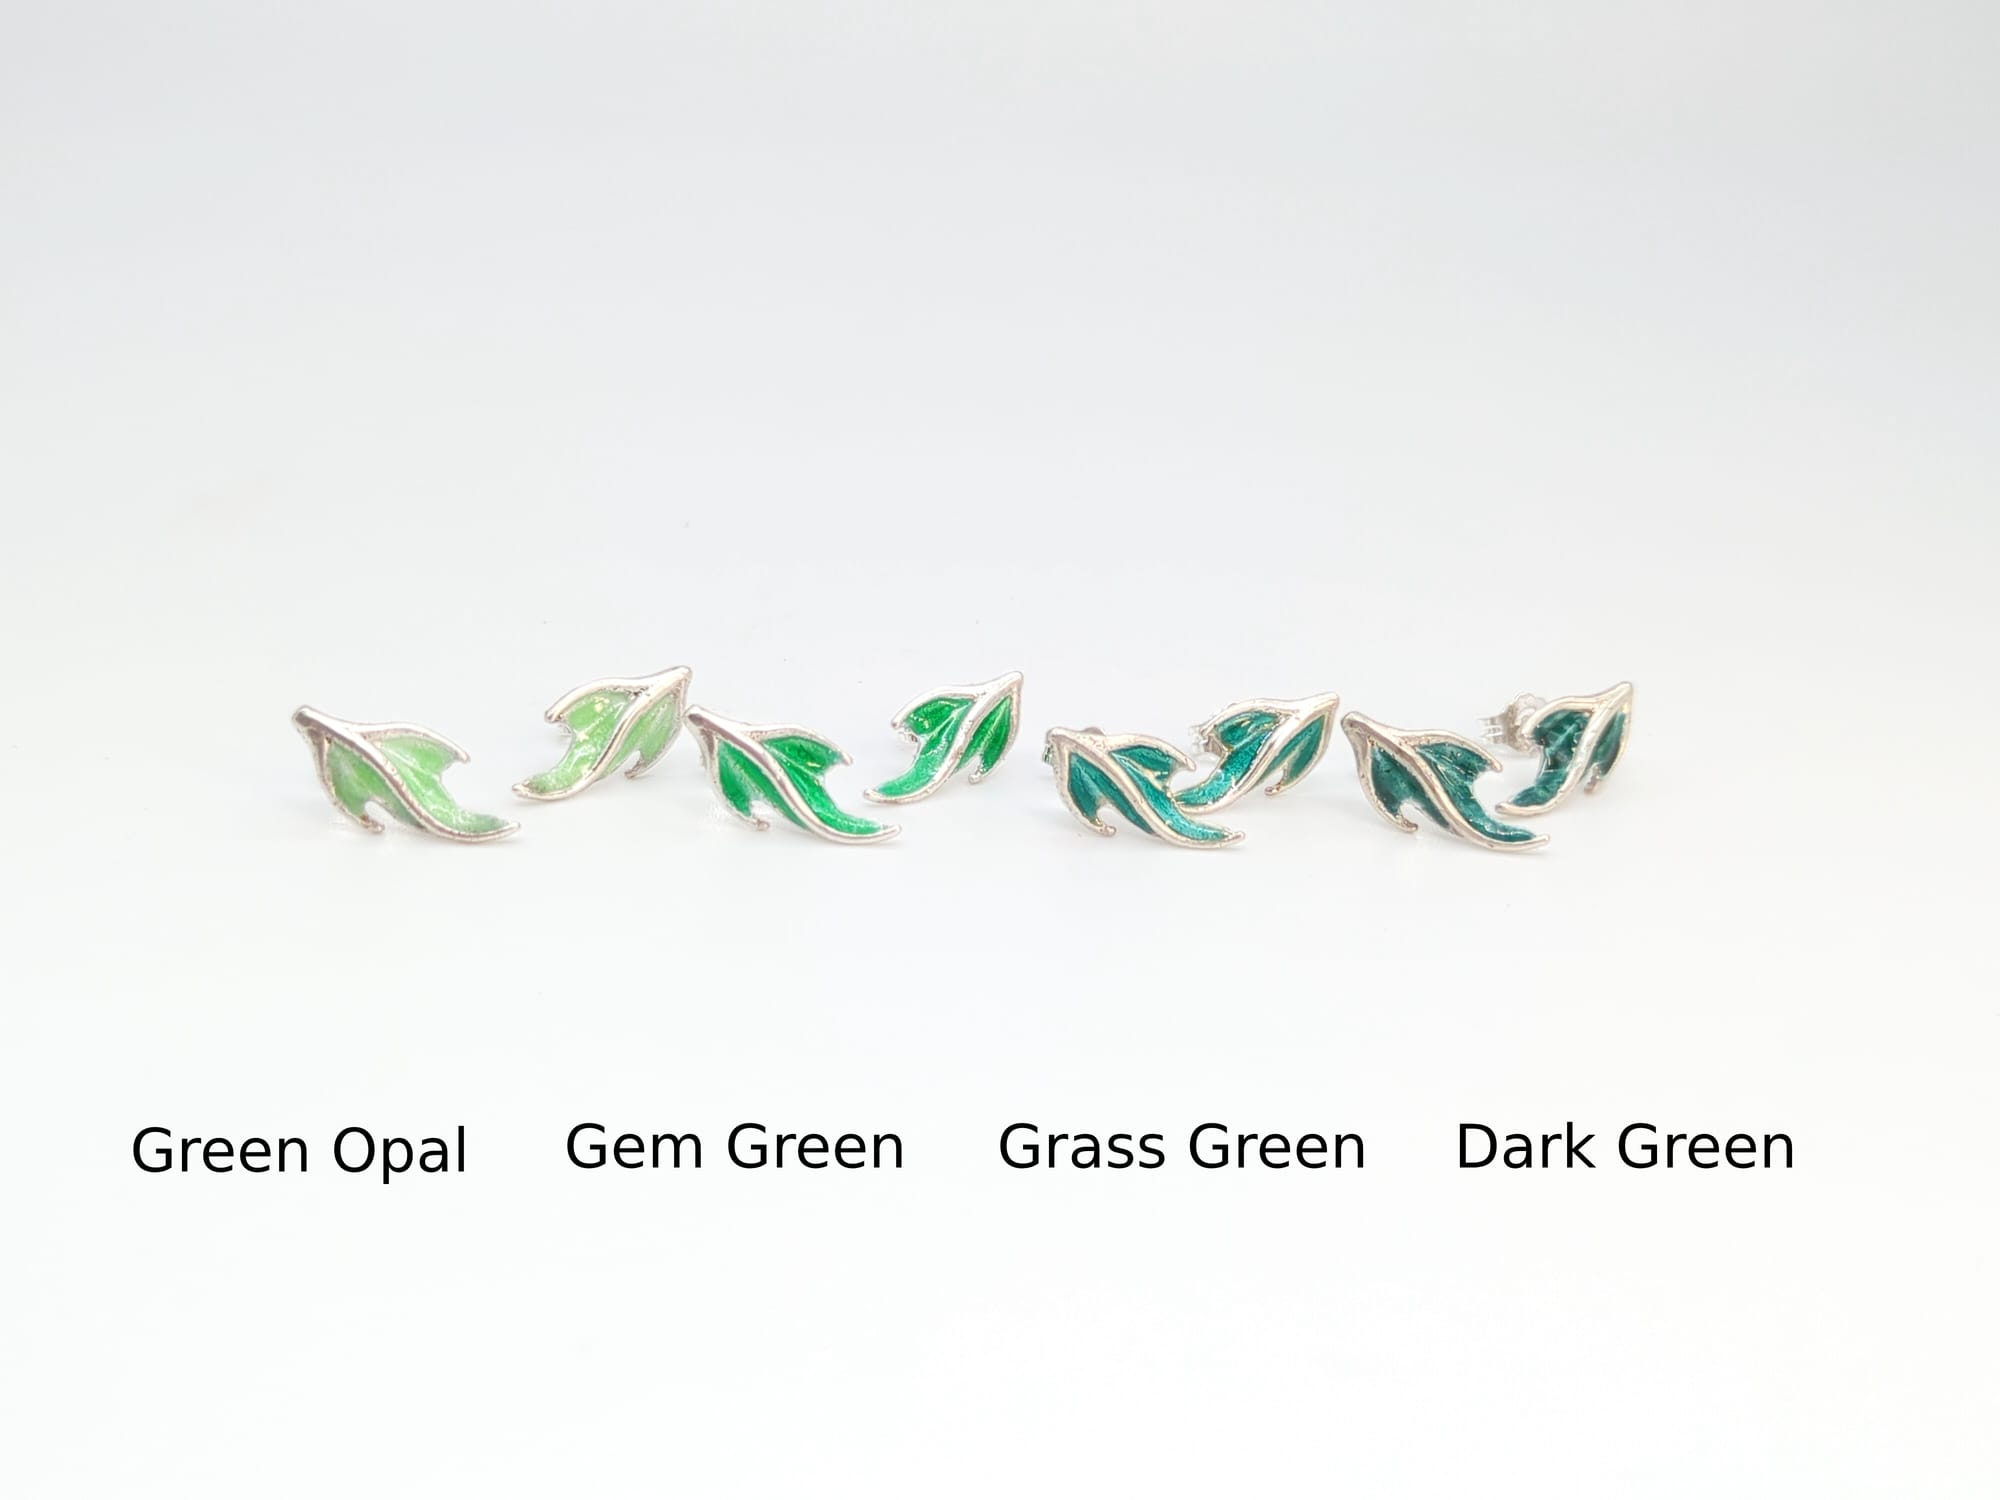
Grass Green and Dark Green are really close to each other, but not quite identical. I wouldn't have named that color 'Grass' Green, but that's the name of the enamel by the manufacturer.
BLUES
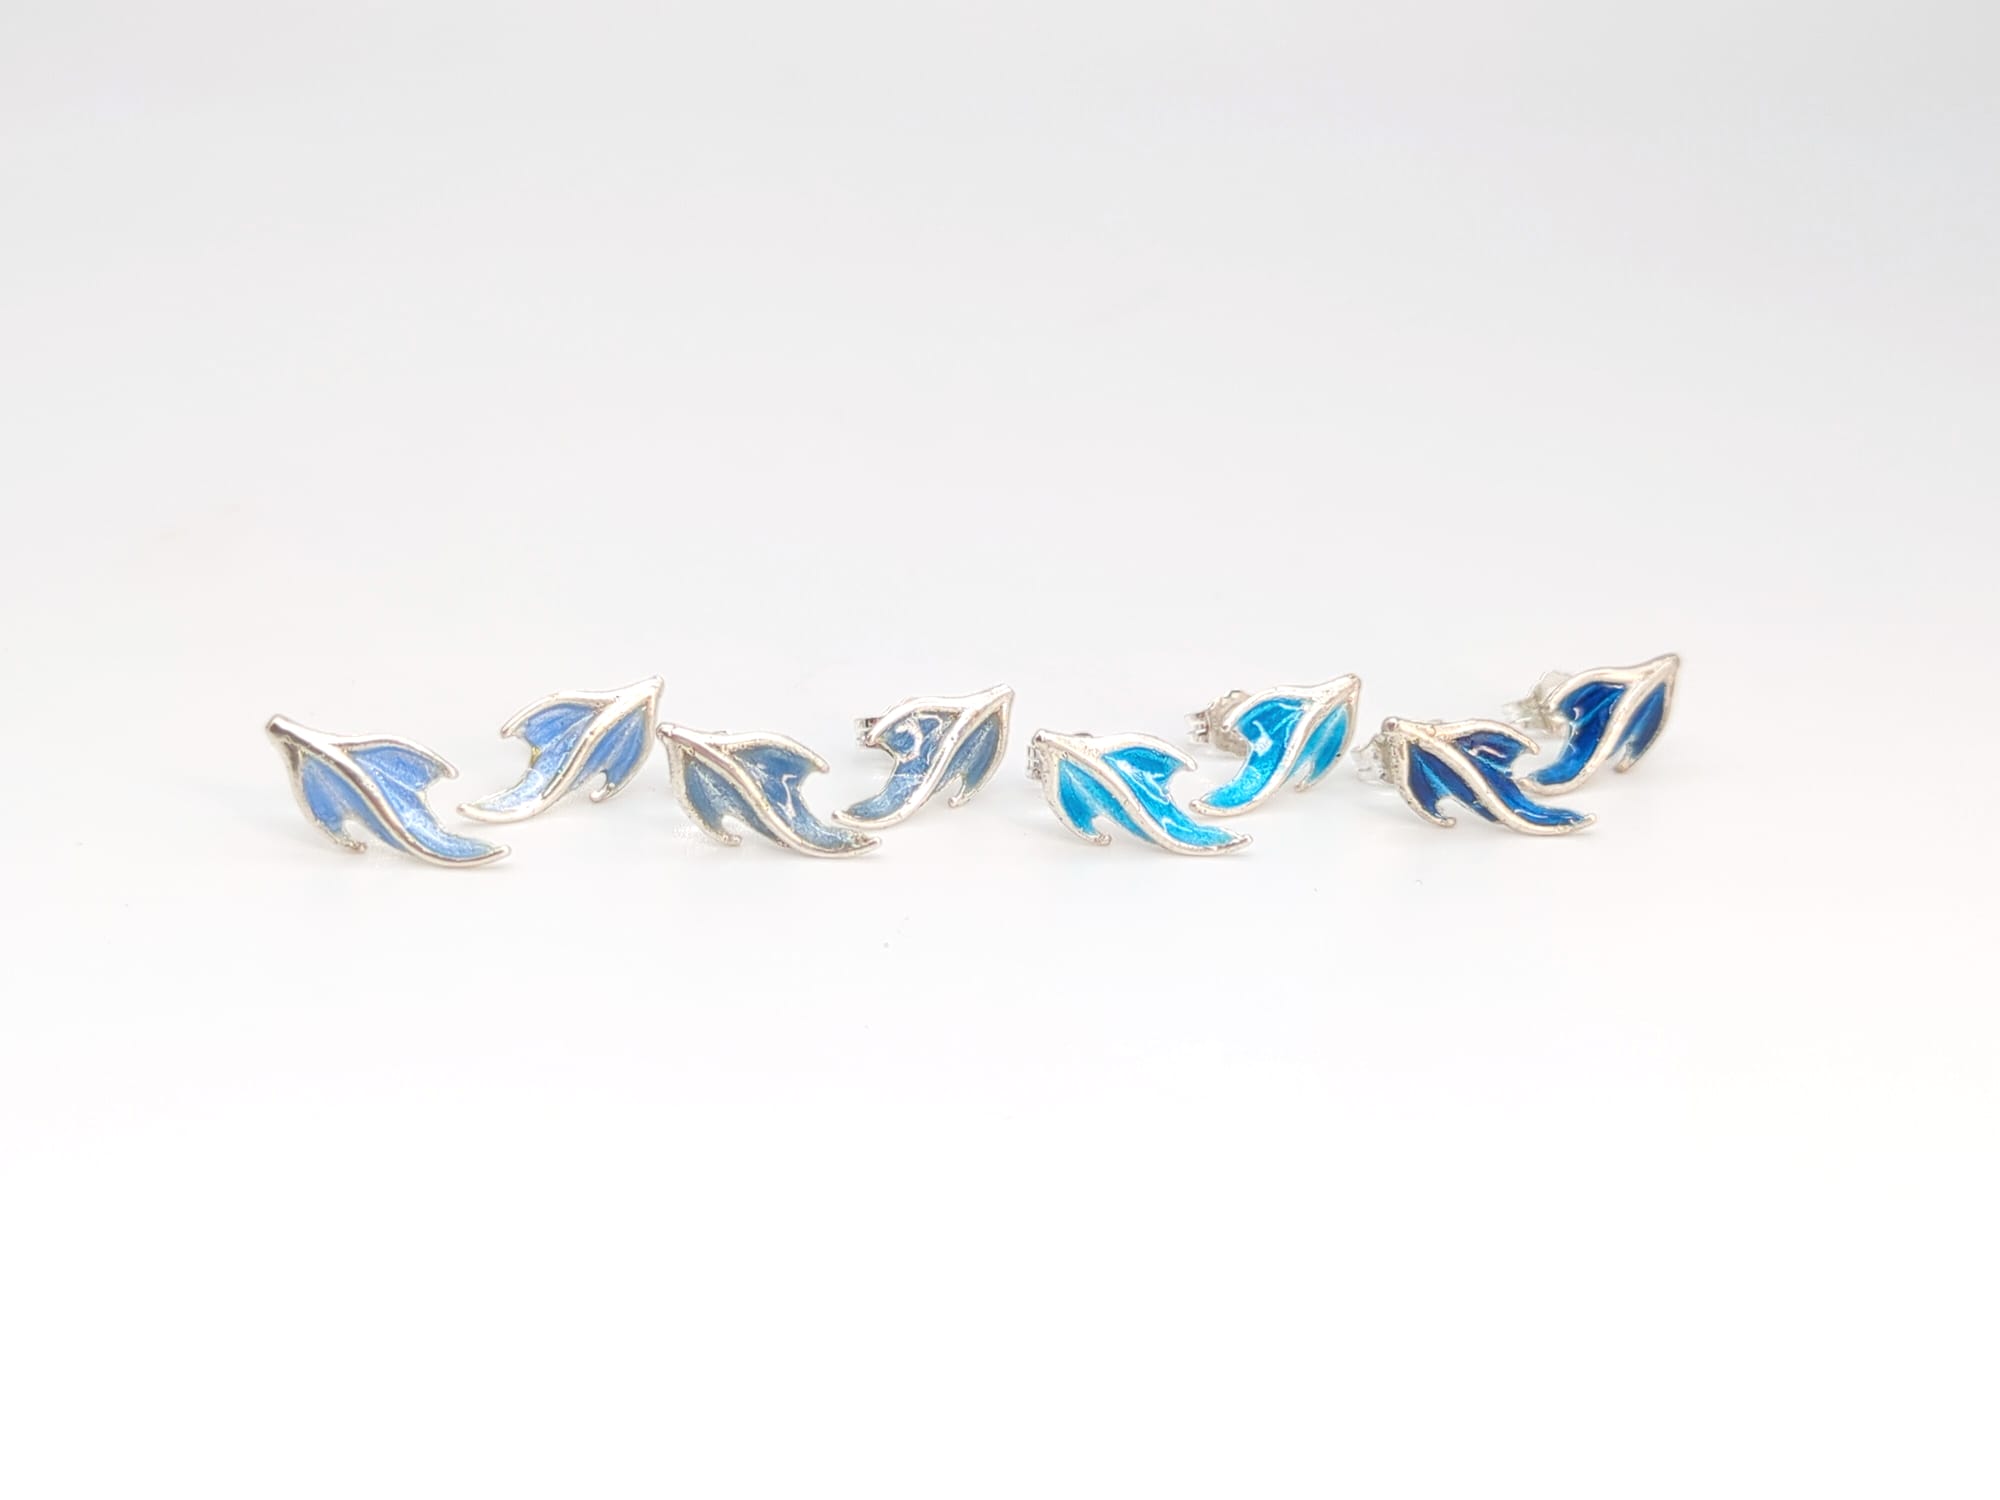
Blue Opal is one of my favorites. Its also very very slightly neon, and never gets darker than this color even with heavy layering. The Delft Blue is exactly the shade of dark blue jeans, with that hint of purplish indigo in it.
Conclusion:
How many earrings can I make in one week 40 business hours?
At the end of day 5, I actually only had 20 pairs of earrings enameled, and none of them had final polish. So if I set out to complete 40 pairs in one week, the answer is none 🙃
However; I did the prep work on all 36 pair, and I expect to finish enameling the rest and polishing them all tomorrow. So how many earrings could I complete in one week? 30 I think. If I had kept the total down from the beginning, they could have all been finished. I spent 2 days on wax injecting, spruing, and investing the flasks, when I probably could have squished that down to one day. And having fewer pieces to smooth and finish on the 4th day means getting to gilding earlier, and having more time for enameling.
Also, casting is hard to measure. The kiln runs all day regardless of how many flasks are in it. Really its far more efficient to spend a few extra days on waxes, and cast 3 or 4 flasks at once (not necessarily all earrings either). Also, do I count the hours I spent doing Other Things while the kiln was just running in the background?
I've gotten two things out of this project. One is a good approximation for the labor time for each set of earrings; probably 30 pair in 40 hours. or a bit over an hour each.
The other thing is some insight into where the bottlenecks of the process are, and what is worth spending extra time on. Casting is time-efficient, however trying to finish big batches at once will give me carpel tunnel in no time.
And hey! Now I have a whole bunch of earrings! 😸
They'll be available soon on my Etsy page
At ACCI Gallery
Or check out my Contact page to see a list of upcoming in-person events!